
One of the most wonderful things about Chromebooks is how simple they are — you don't have to buy additional accessories to make them work. They just do most of what people want out of the box. But perhaps you have additional needs like using a larger external screen, necessitating having an external keyboard and mouse in the process. Now that so many of us are working from home, it's worth investing in a proper workstation setup to help your productivity and give you more screen space to spread out your work. Here's how to use a Chromebook with a monitor, keyboard, and mouse to get the best experience on Chrome OS.
Hubs and Docking Stations: Are you going wired or wireless?

While most of the best Chromebooks have ample USB ports for plugging in all your peripherals, HDMI is becoming harder and harder to find on Chromebooks. However, that's okay because all USB-C Chromebooks can add on a secondary screen via a USB-C hub, docking station, or a USB-C to HDMI adapter. Which one do you need? Well, that depends on you and how much you're connecting:
- Are multiple computers going to be using this workstation? Are you making a workstation that you and your kids can all use in turn for homework, paying bills, and maybe some light gaming? Then you'll want either a dock or USB-C hub, and you'll want to opt for wired peripherals so that you don't have to re-pair a Bluetooth mouse and keyboard with each person's computer.
- Are you connecting more than two things to your computer? Most Chromebooks have only one or two USB-A ports, so if you need to connect a mouse, keyboard, and a USB microphone for those Zoom meetings and online classes, you'll want a docking station to be sure you have enough USB-A ports for all your normal peripherals, plus at least one spare USB-A port for an external drive or thumb drive should you need to access an old
- Do you just need to connect a monitor? If you already have a wireless mouse/keyboard you're using and need to add on a monitor, you can save yourself some money by just getting a USB-C to HMDI adapter if you're not purchasing a USB-C-enabled monitor.
While there are tons of excellent USB-C hubs out there, finding good docking stations for Chromebooks is a little more tricky, as the video output situation on docks is usually geared toward Windows and Mac. See, there are several USB-C "alt modes" that can be selected depending on the hardware the dock wants to support: there's HDMI alt mode, DisplayPort alt mode, and Thunderbolt 3 alt mode. The type of alt mode supported by the dock — and more importantly, supported by your Chromebook — determines whether your Chromebook will work with a certain dock or not.
Given many docking stations support both HDMI and DisplayPort, compatibility can get tricker than it does on USB-C hubs, which usually only have HDMI video ports. Of course, USB-C hubs also don't come with their own power supplies as docking stations do, so if you buy a USB-C hub, make sure you buy one with pass-through charging high enough to power both the hub and your Chromebook.
Connect everything
AUKEY USB C Hub 8-in-1 Type C Adapter with Ethernet Port
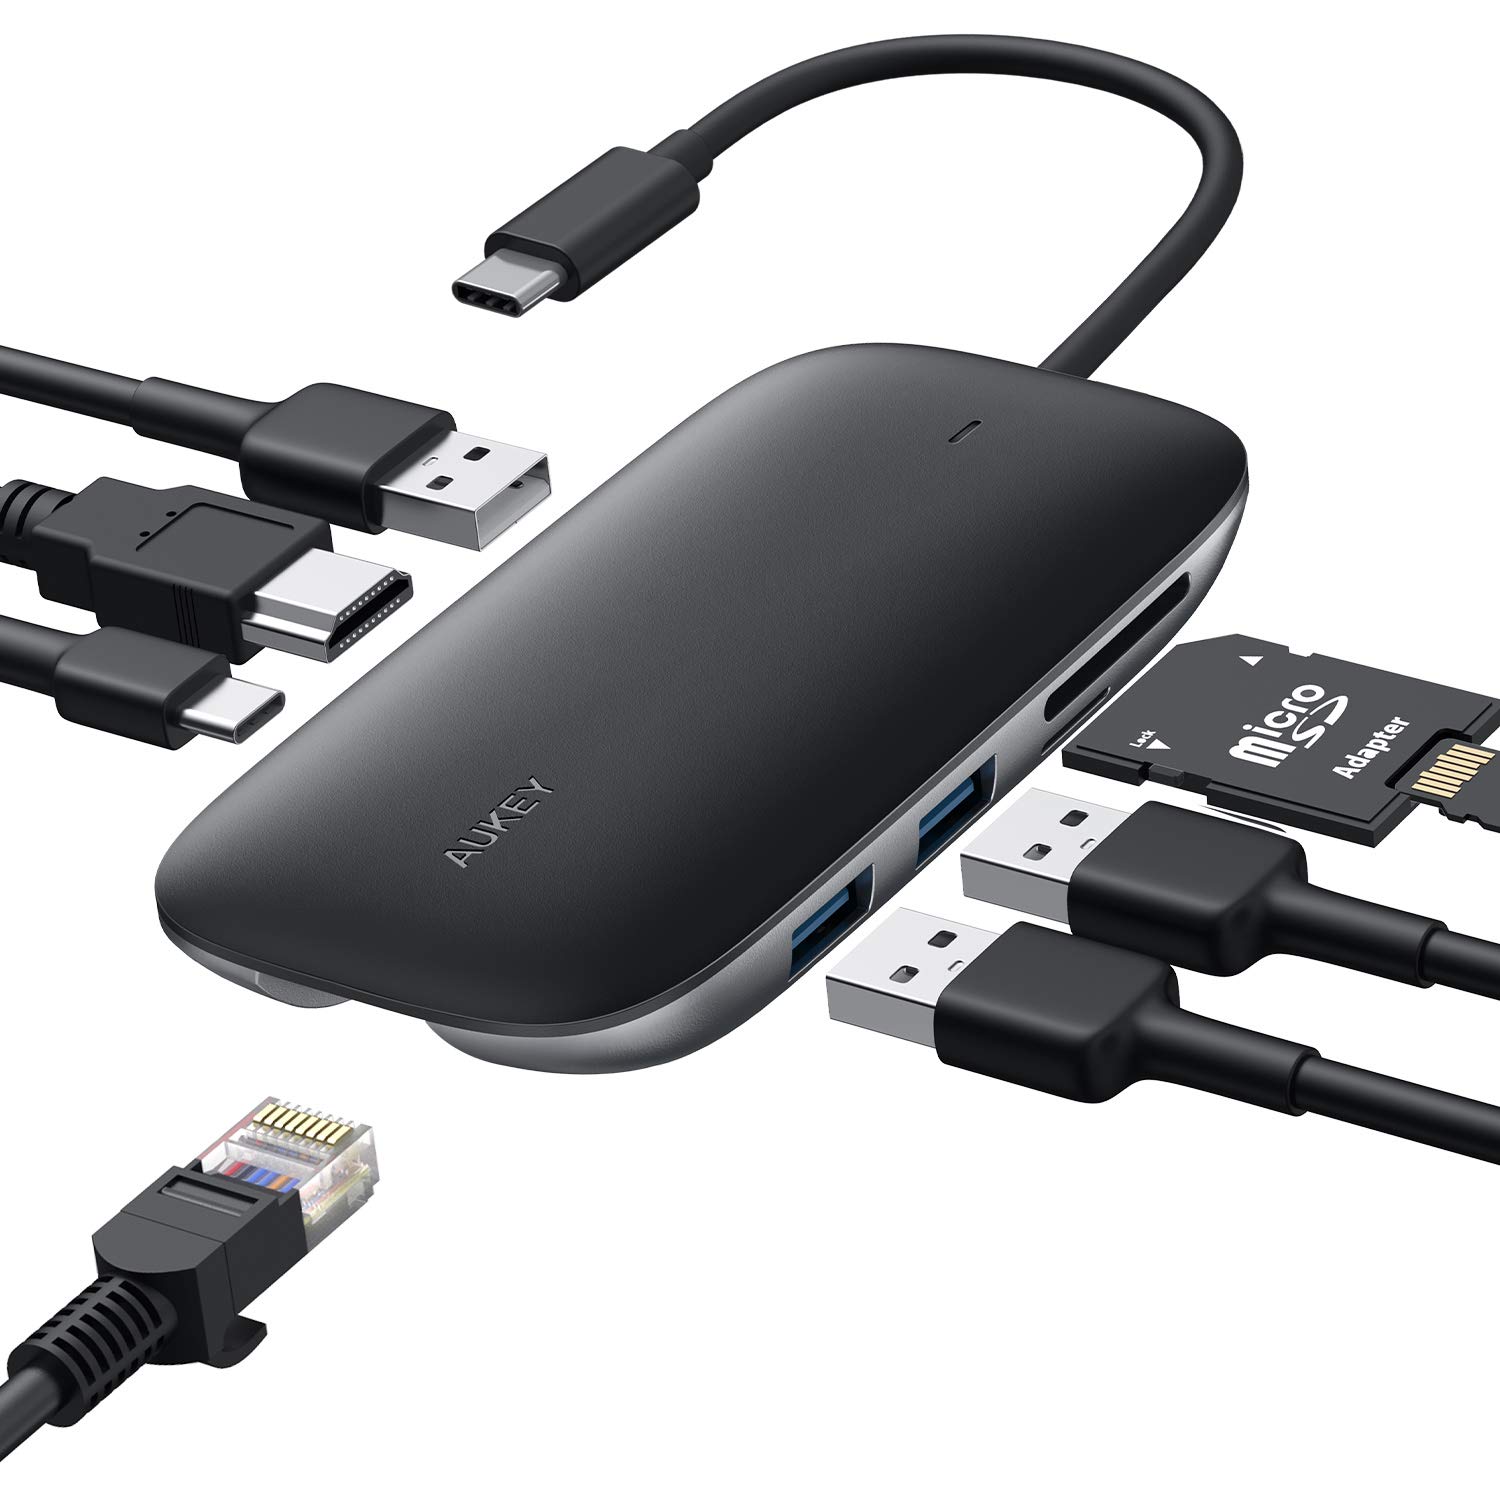
AUKEY's USB-C hub has delivered generation after generation, and this is the model I've used with a dozen Chromebooks as well as a Chromecast with Google TV. It comes with 3 USB-A ports, 100W USB-C pass-through charging, 4K HDMI, SD, and microSD card slots.
Monitor

Once upon a time, just about every Chromebook came with an HDMI port. Still, these days with USB-C supporting video out, most manufacturers have removed the seemingly superfluous HDMI port. If your Chromebook still has HDMI, then all you need is a good monitor and then plug in the HDMI cable that comes with it. If you don't have HDMI, you can also buy a USB-C monitor if you don't want to use one of the USB-C hubs or docking stations mentioned above.
Once you have your monitor plugged in, you'll still want to get things properly arranged and tuned in the Chrome OS settings.
How to adjust your monitor settings in Chrome OS
Once you plug your monitor into your Chromebook, it will start displaying an extension of your desktop immediately. But of course, you'll probably want to tweak the settings a bit, so it does exactly what you want it to for the best experience.
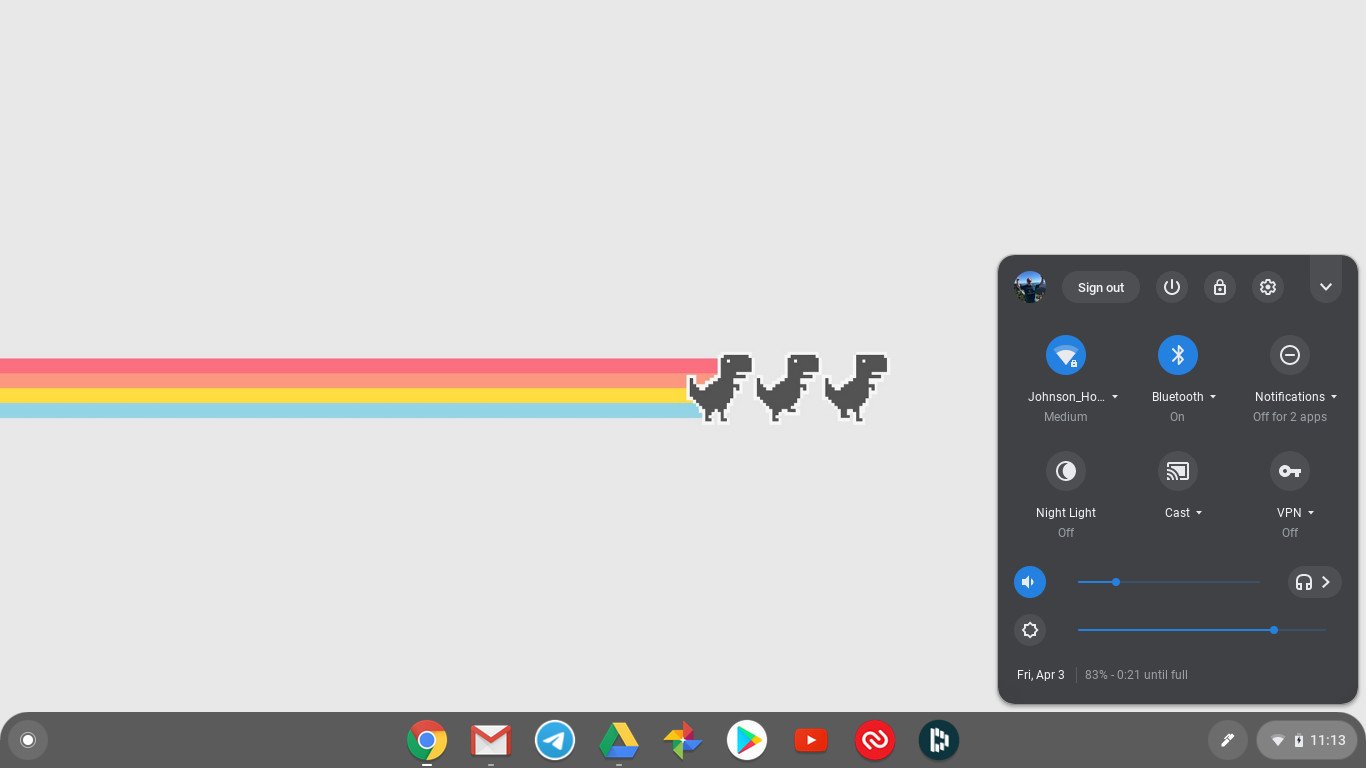
- Click the status area (that's where your Wi-Fi and battery icons are).
-
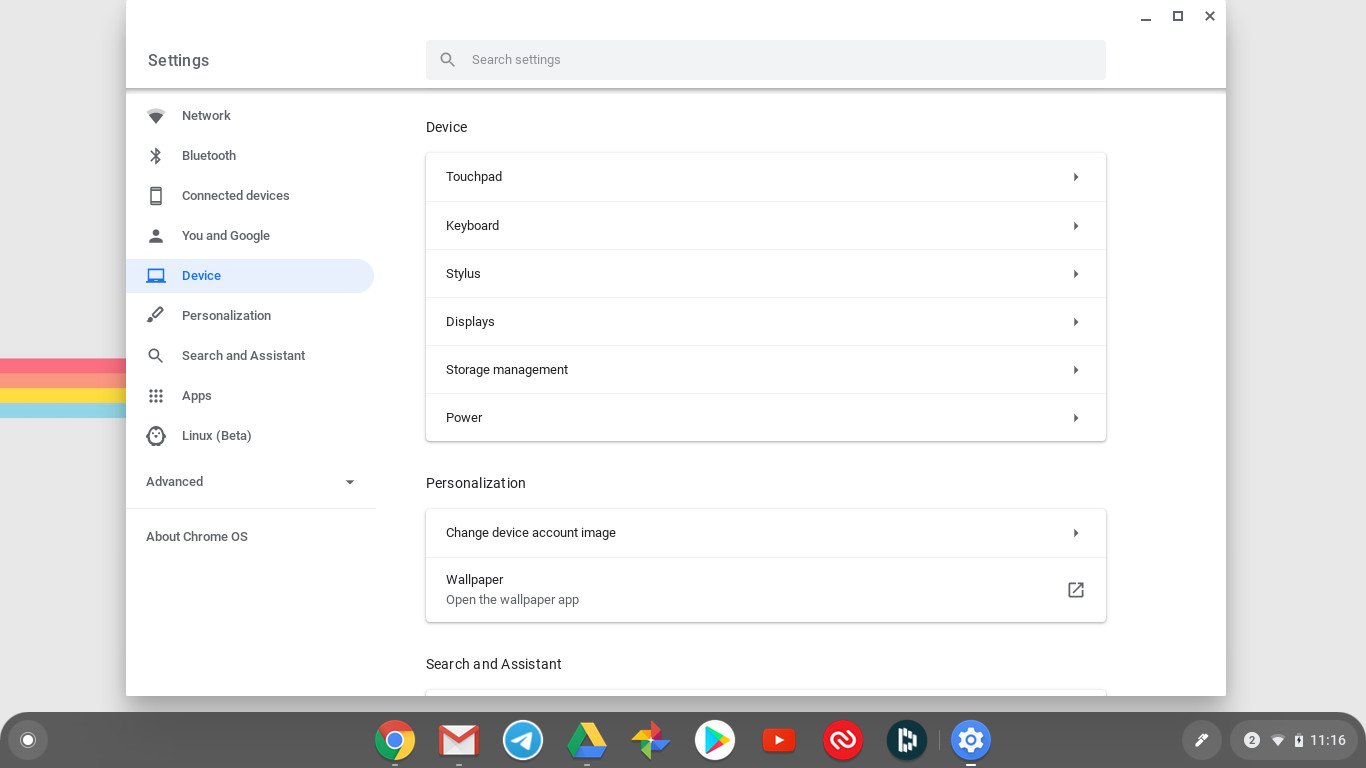
Click on the settings icon (the little symbol that looks like a gear).
-
Click on Device.
-
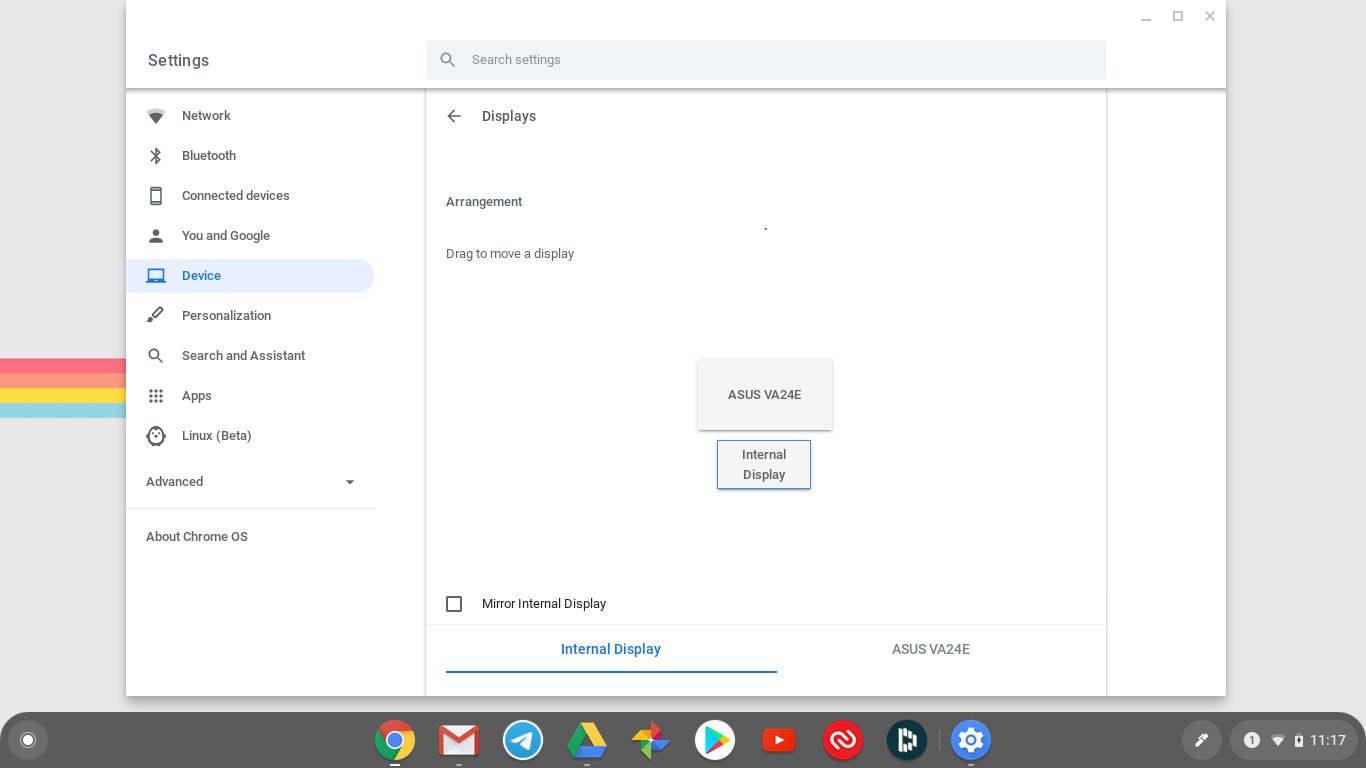
Click on Displays.
-
Arrange the displays according to your preference (I like the big monitor on top). You can also decide if you want to mirror the internal display, or tweak the dispaly settings further (such as resolution and orientation).
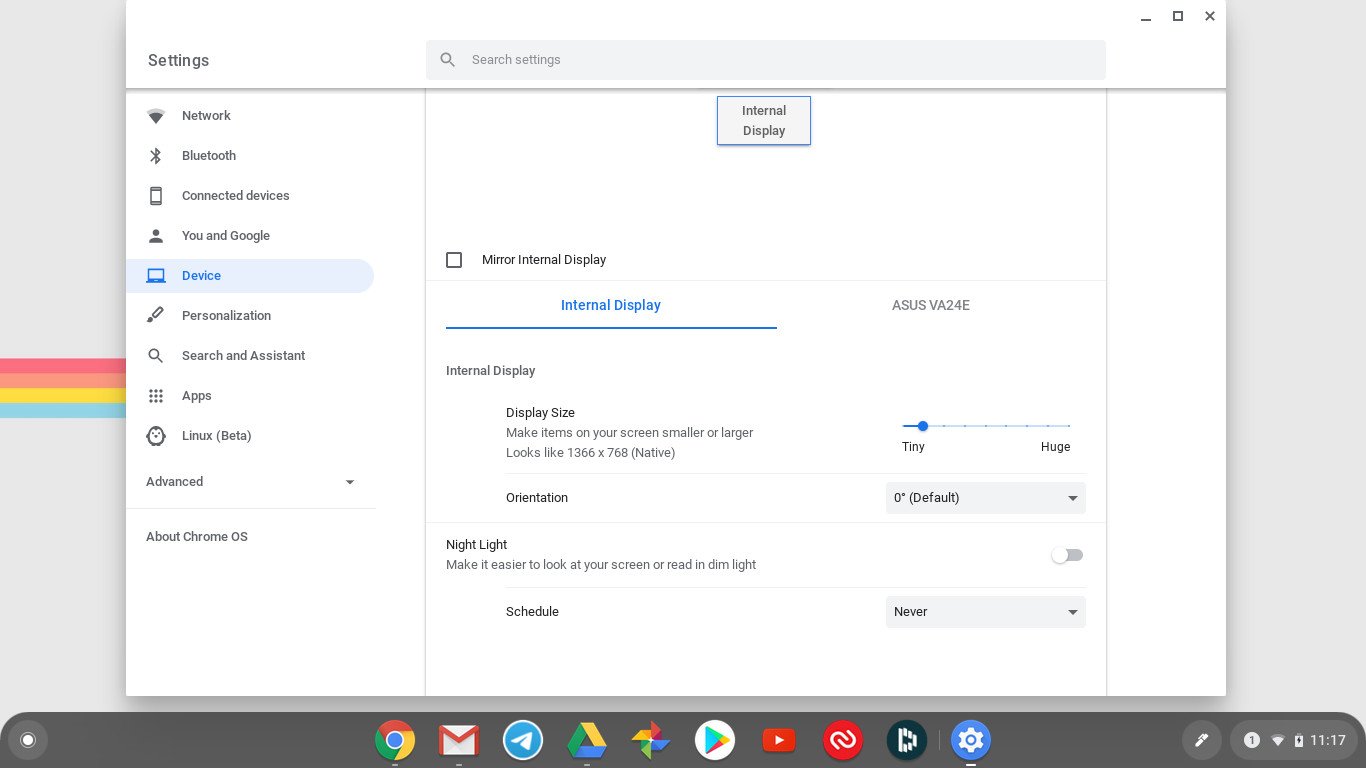
While you can leave your external monitor's resolution on the default, I advise adjusting the Display size up and down and see if you prefer having things enlarged or normal-sized. If your monitor is some 40-inch TV, you'll probably want to adjust Display size up a little, so the text isn't quite as small.
Chances are, you'll want the second display to be the "primary" display in this situation. If you're using it as an extended desktop, you may want to keep the Chromebook as the primary display without a keyboard and mouse. The same goes for mirroring versus extended — you'll know right away whether you want the external monitor to duplicate what's on the Chromebook or be its own, separate display.
If you need to quickly switch between mirroring and extending your desktop, you can hold ctrl and press the full-screen button (F4 on a traditional keyboard) to toggle between mirroring and dual-display mode.
Protect your eyes
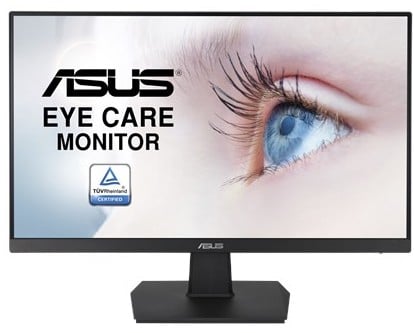
ASUS VA24 EHE Full HD Monitor
$115 at Amazon $130 at Best Buy
The perfect size second screen
This monitor from ASUS is the one I chose to complement my Chromebook setup. The size lets me have two full-size windows side-by-side, and its Eye Care technology makes it easier to use for longer.
Mouse

Just like monitors, Chrome OS is perfectly ready to handle connecting a mouse to save you from using the trackpad 100% of the time. Whether you like wired or wireless mice, you can plug in or pair your mouse and be up and running in a matter of seconds.
The one thing to keep in mind here is if you happen to prefer those fancy mice that have optional software for controlling special buttons, wheels, or interactions with the mouse (Logitech comes to mind). Those software suites are designed for Windows and Mac computers and won't install on Chrome OS. That doesn't mean that the mouse won't work; it just means that you won't have fine control over extra non-standard buttons and wheels. Mouse speed can still be adjusted in Chrome OS Settings in the Device section.
USB mice
When it comes to USB mice, there's really nothing to do but plug in the connector — whether that's a cable or a wireless receiver — and go. Just make sure before you buy to check which ports you have on your Chromebook. Many Chromebooks still offer USB-A ports, but some may only have USB-C.
Bluetooth mice
To connect a Bluetooth mouse, make sure that your mouse is turned on and pairing mode is enabled (the process will differ between mouse models).
- On your Chromebook, click the status area (that's where your Wi-Fi and battery icons are).
- Click on Bluetooth.
- Look for the model name of your mouse, and the devices will pair in short order.
Just like the trackpad or a USB mouse, you'll able to adjust the pointer speed in the standard Chrome OS settings.
Point the way
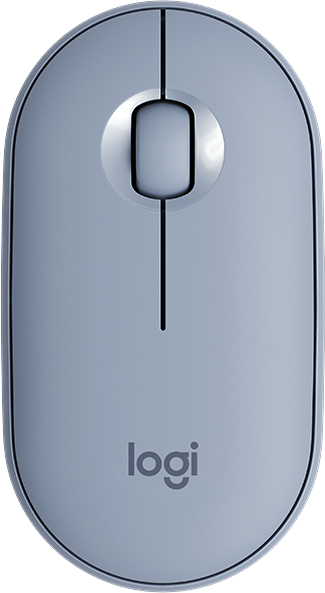
Logitech Pebble M350 Bluetooth Mouse
From $26 at Amazon Fro $29 at Best Buy
Perfect partner
Ultra-lightweight and perfect for righties or lefties, this quiet mouse should last you over a year and a half on just one AA battery!
Keyboard
Getting an external keyboard for your Chromebook is the one part of this equation that can take a little extra thought. Like adding a mouse, you can plug in or connect any USB or Bluetooth keyboard to your Chromebook. Still, you have to remember that Chrome OS uses a non-standard layout for the function bar, with special keys in replacing the F1-12 keys and having the search key instead of a caps lock. While you can use any keyboard you have lying around, if you're buying new, consider a Chrome OS-specific keyboard, so you don't have to remember that F3 is Refresh instead of F5, which is the Overview key.
USB keyboards
Just like a USB mouse, Chrome OS can handle USB keyboards the instant you plug them in. You will need to remember what the F keys do because it's slightly different than the Chrome OS layout:
- F1: Previous page (Back)
- F2: Next page (Forward)
- F3: Refresh
- F4: Fullscreen
- F5: Overview
- F6: Lower brightness
- F7: Raise brightness
- F8: Mute
- F9: Volume down
- F10: Volume up
- F11: Fullscreen (yeah, it's really on here twice)
- F12: Inspect webpage (works the same as Ctrl + Shift + I)
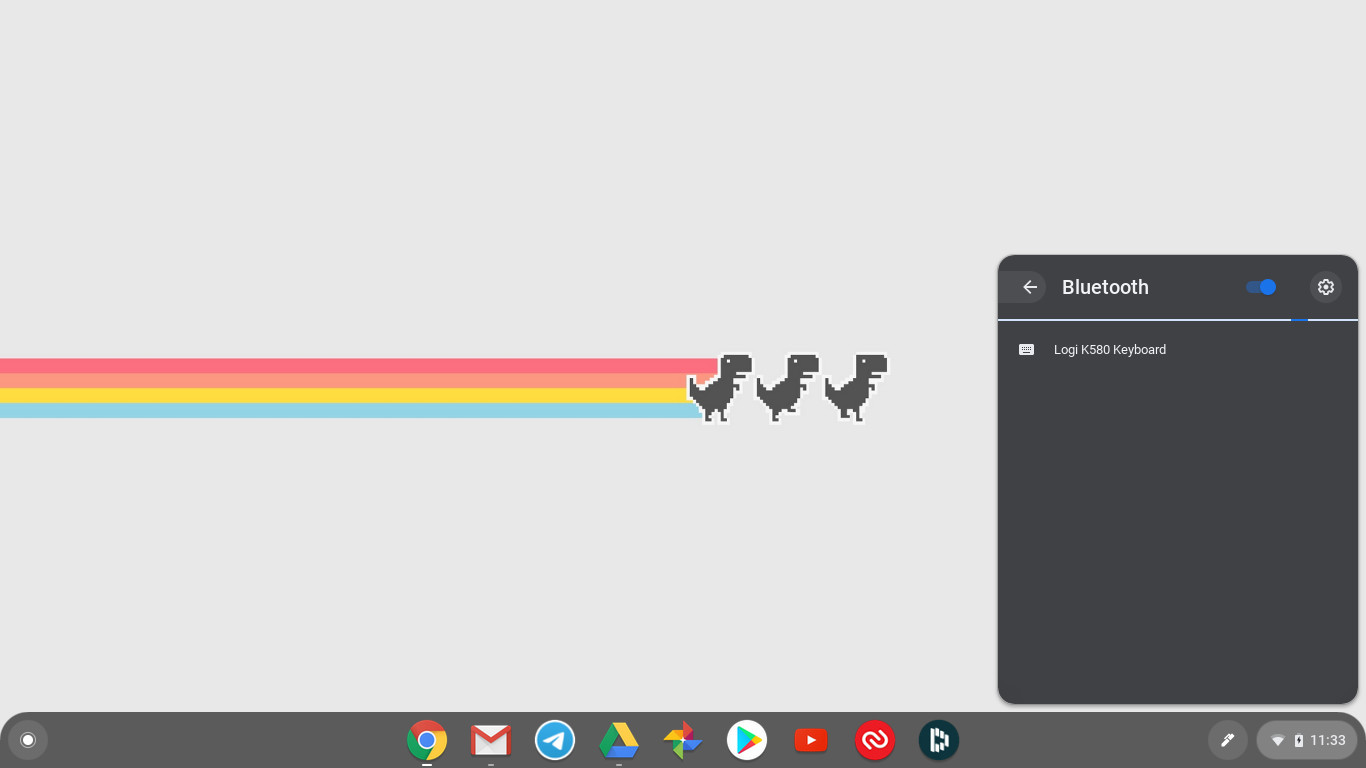
Bluetooth keyboards
Connecting a Bluetooth keyboard is just like connecting a Bluetooth mouse.
- Put the keyboard into pairing mode (usually by turning it on).
-
Open up the Bluetooth settings on your Chromebook from the status area and click on the Bluetooth icon.
-
You'll be prompted to type a sequence of numbers on the keyboard, and press enter to pair.
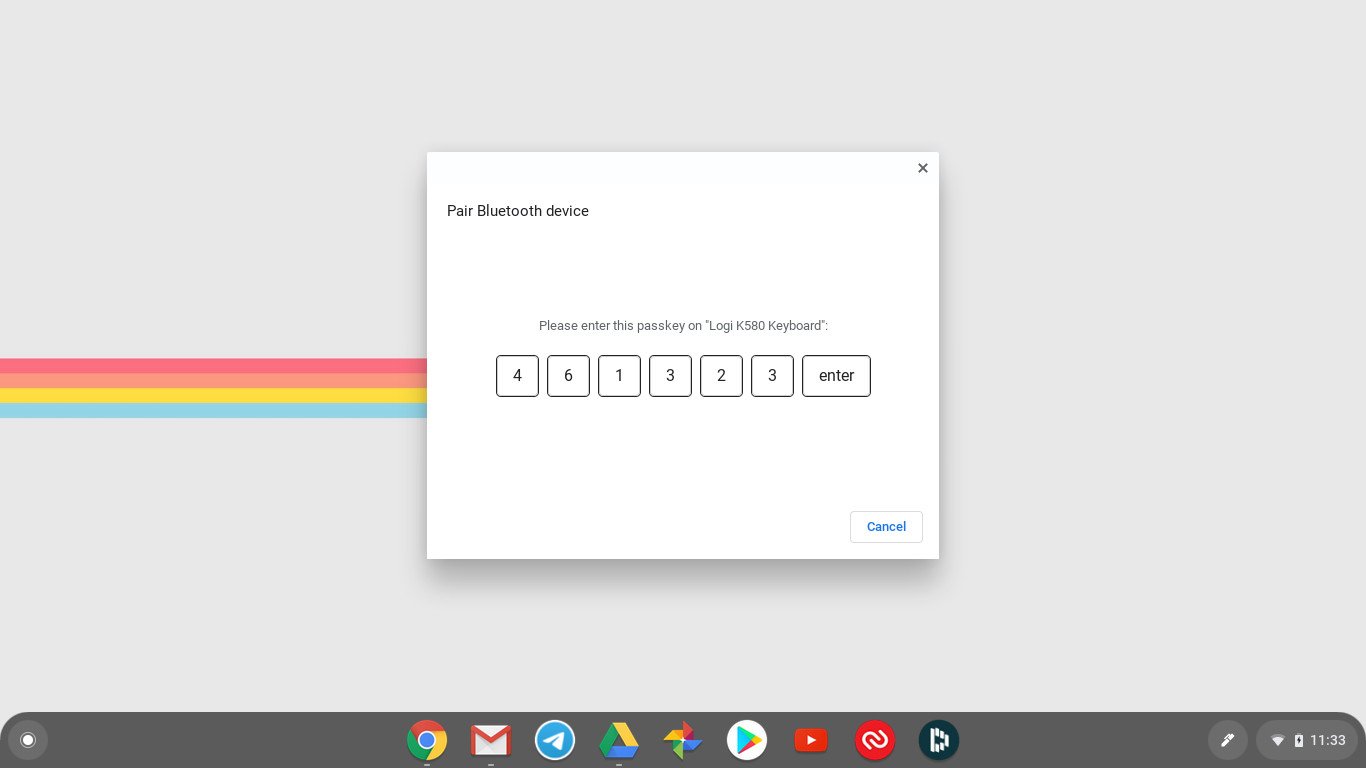
-
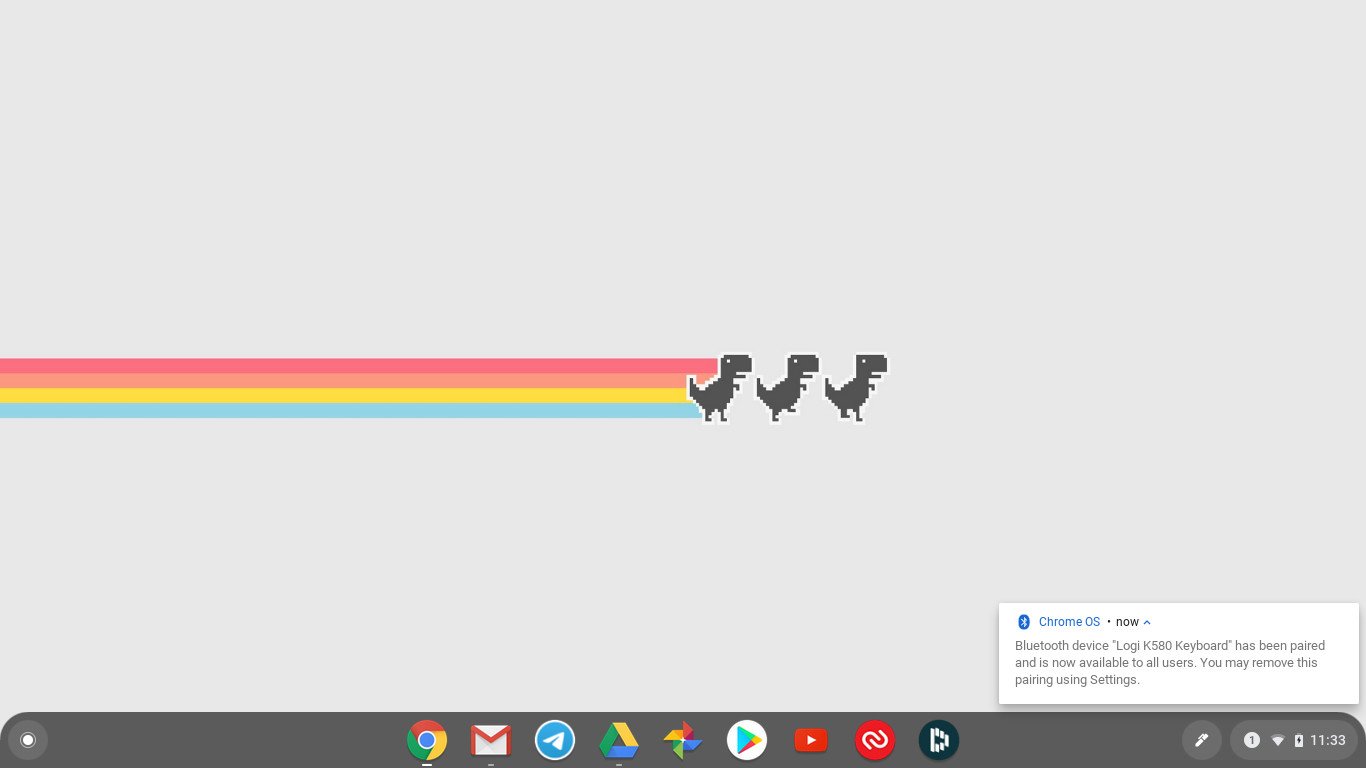
Your keyboard is now paired to your Chromebook.
Hunt and peck
Logitech K580 Chrome OS Edition Keyboard
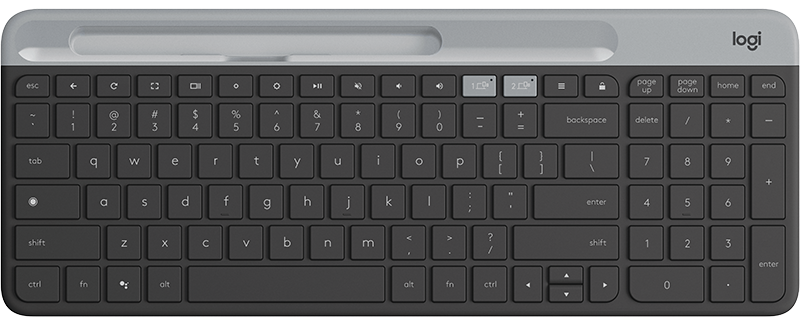
Petite and portable
This well-made keyboard is just the right size to lug around and features Chrome OS-specific keys, including one for the Google Assistant!
Andrew Martonik contributed to an earlier version of this article.
Source: androidcentral