If you've ever wondered how to install Kodi on a Raspberry Pi, the answer is a bit more complicated than just following a few steps. Why? Let us explain in this guide.
Kodi is the continuation of XBMC, a free and open-source application that is a great media player and a complete replacement for any other media-centric software. It's not a streaming server or DVR. It's the software you use to watch video content and listen to music through any screen with an HDMI connection.
Because it's open-source, Kodi runs on just about every platform known to man — Windows, Android, iOS, macOS, and a gazillion different flavors of BSD and Linux.
Several operating system platforms also work really well on the Raspberry Pi. A marriage of the two makes for a cheap media center that's easy to set up and has all the features you'll find on expensive alternatives. It's a DIY project that anyone can do, and the results are incredible.
Before getting started
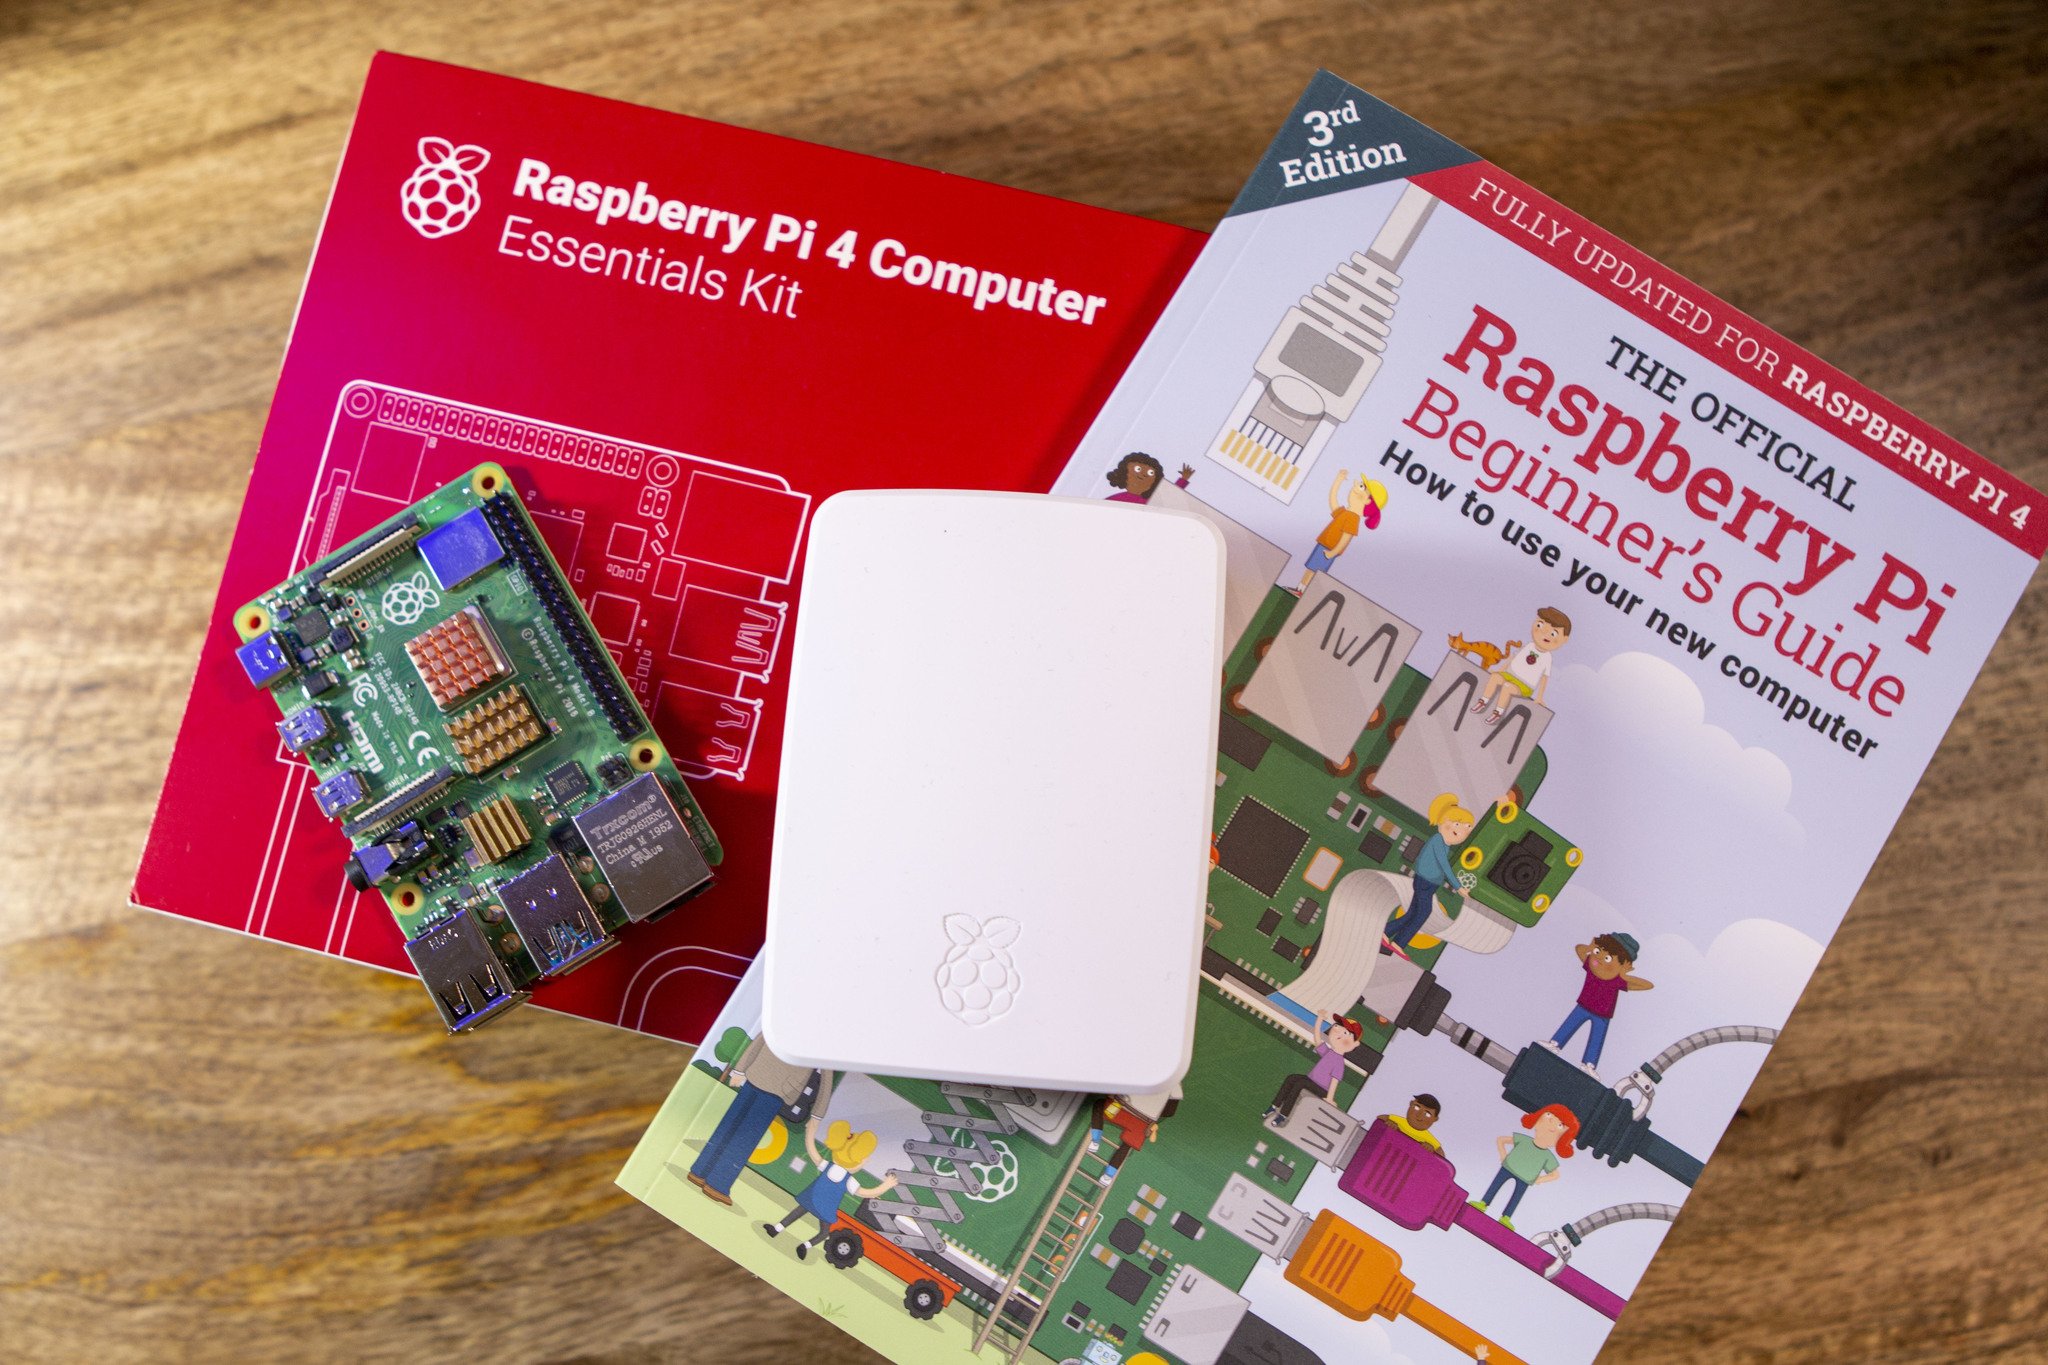
As with any DIY project, you'll need a few things before you can get started. We've compiled a list of everything that you'll need to get Kodi installed on your Raspberry Pi:
- Raspberry Pi
- A case of some sort
- A power supply
- A microSD card with an adapter to plug it into your computer
You can run Kodi on an earlier model of Raspberry Pi (and plenty of folks do), but the better hardware in the third revision makes a big difference. The power supply needs to provide 5 volts at 2 amps through a Micro-USB or USB-C port. Any microSD card will work, but faster cards are better — try to get something Class 10 or higher. You'll also want one at least 8GB in size.
The case needs to have decent airflow because things can get hot. It should also stay together if the cat or a roaming infant gets behind things and pulls on cords. And you'll need a cable that can take HDMI with audio from the Raspberry Pi to the screen you want to see your stuff on.
The easy way is to buy one of the best Raspberry Pi kits that has all this stuff in it. You'll save a couple of dollars and a lot of time. I went with this kit from CanaKit, and it has everything you need to get started. It's decent quality stuff.
You'll also want to have a keyboard and mouse you can use directly with your Kodi box. Almost any keyboard and mouse will work, but after trying a whole bunch of them through the years on various small electronic projects, I have to recommend the Logitech K400. It's bigger than many others, but it works on everything without any setup or hassle — even the PlayStation 4, which can be finicky and hates peripherals.
I have like three of them around the office, and they've held up just fine.
How to install Kodi on Raspberry Pi using Raspberry Pi Imager
It's worth noting that this method installs Kodi as the main interface on your Raspberry Pi. This means that every time your Raspberry Pi is turned on, this is what you'll be using instead of relying on the Pi desktop to interact with Kodi. You'll still need to use a keyboard and mouse to navigate through the setup process and the various menus after the fact.
- Download Raspberry Pi Imager onto your PC from the Raspberry Pi website.
-
Once installed, open the Pi Imager app on your PC.
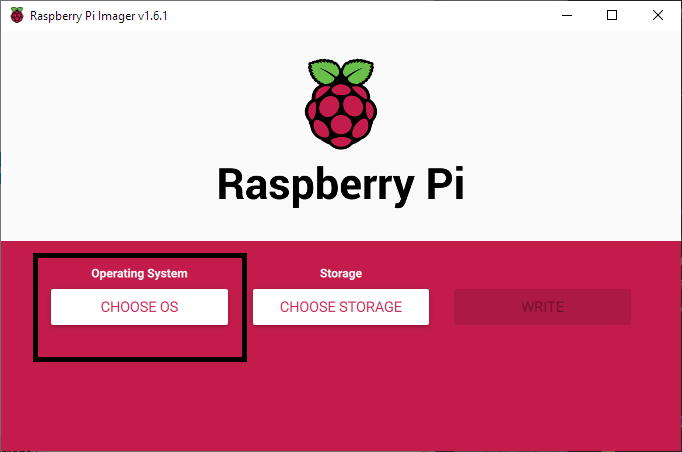
- Insert your microSD card for the Raspberry Pi into your PC.
-
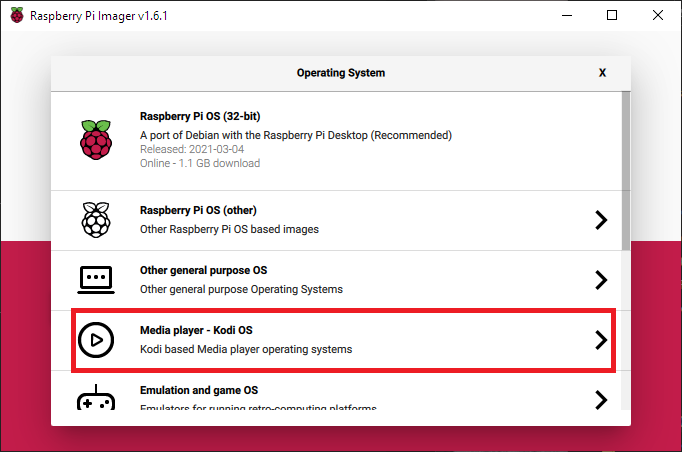
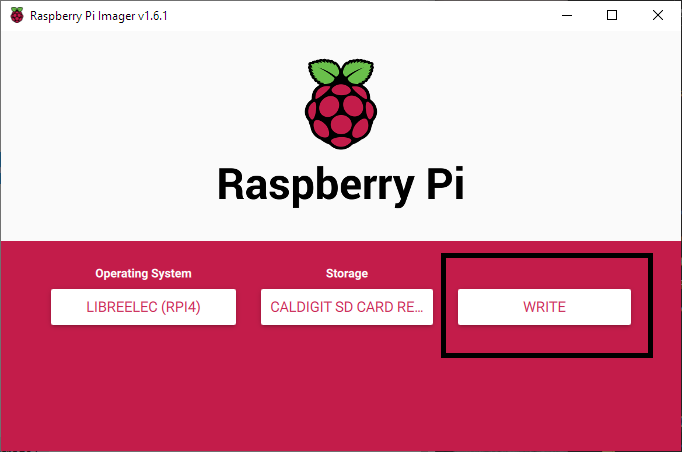
Under Operating System, select Choose OS.
-
Select Media player - Kodi OS from the pop-up menu.
-
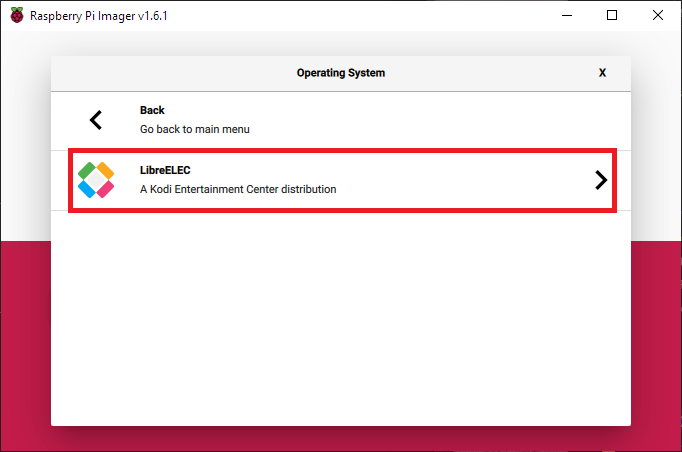
Select LibraELEC from the next on-screen prompt.
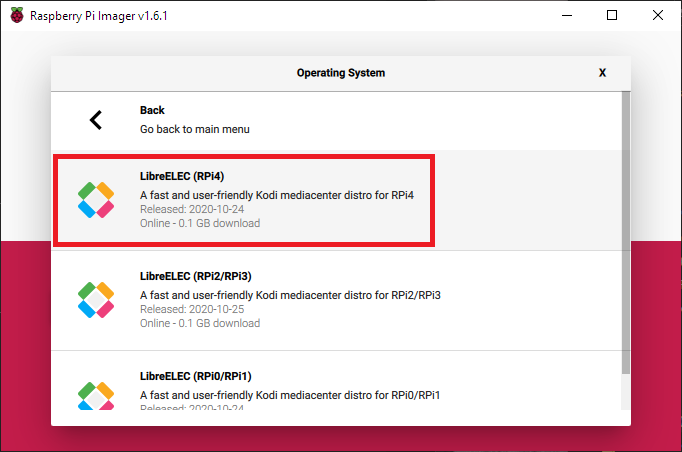
- Choose the version of LibraELEC based on the Raspberry Pi version you are using.
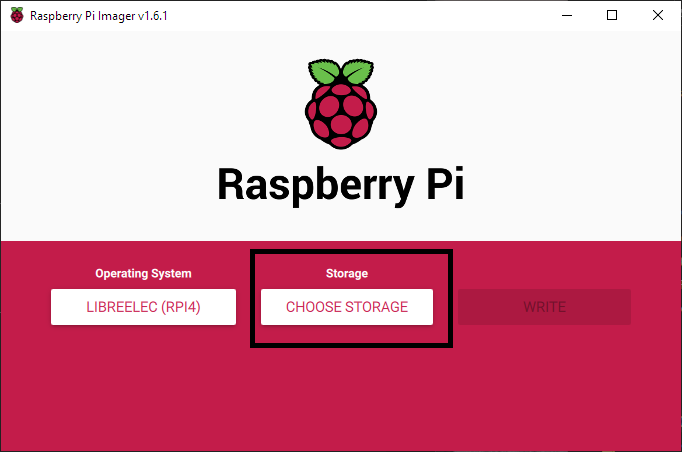
- Under Storage, select Choose Storage.
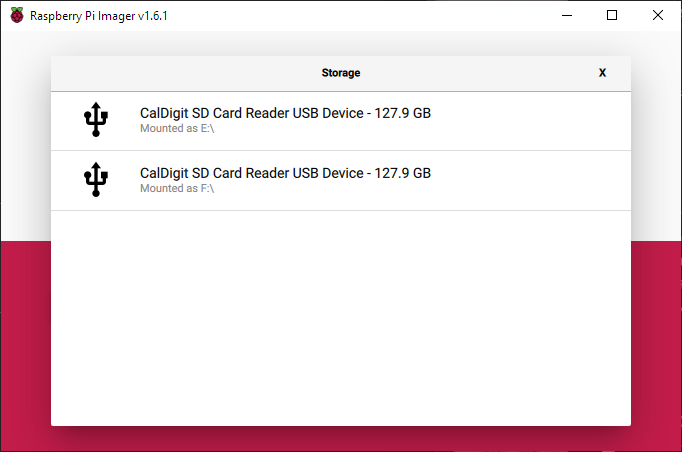
- Select your microSD card from the list of storage options.
- Click the Write button.
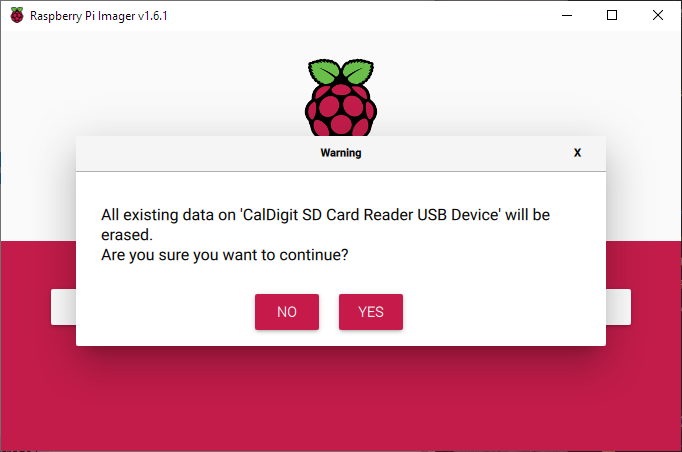
- Click OK to confirm that all of the data on your microSD card will be wiped.
- Click Continue after the installation has finished.
- Safely eject the microSD card from your PC if it's not done automatically.
Once the Kodi installation is completed, you can pop that microSD card into your Raspberry Pi. Make sure everything is connected, like the monitor, keyboard, mouse, and power, then fire it up.
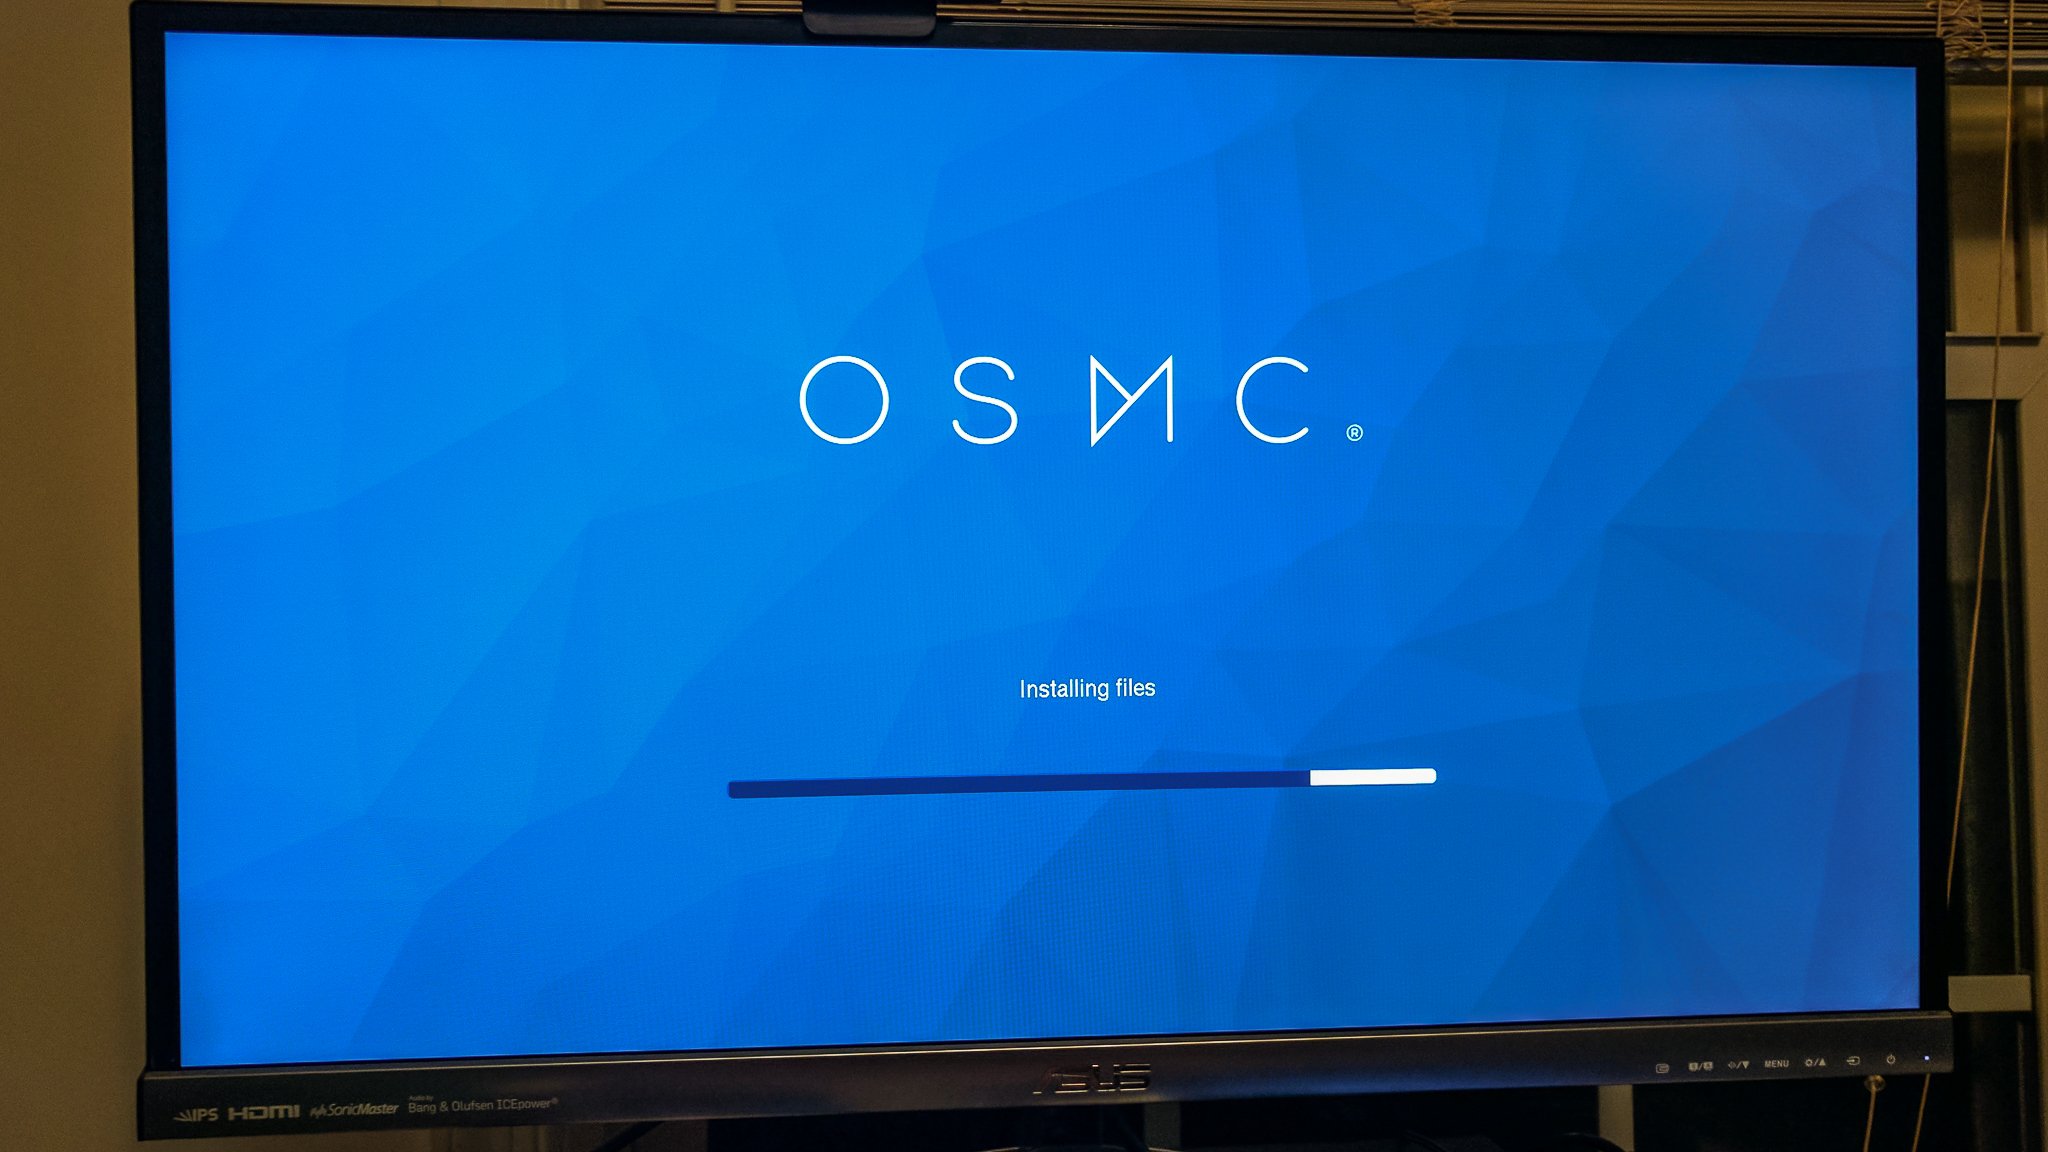
Upon starting up for the first time, you'll see a similar screen to what you would find to install Raspberry Pi OS onto the Pi. The system will automatically create the partitions it needs before botting into Kodi via LibraELEC.
After the Pi reboots, it'll take you straight into the LibraELEC "wizard" to help you get Kodi set up properly. This includes setting your location, time zone and connecting the Pi to your home network. Simply follow the on-screen prompts, and then Kodi will be all set up and ready to go.
How to install Kodi on Raspberry Pi using Terminal
Unlike the first method of using Raspberry Pi Imager to install Kodi as the primary interface, this next method installs Kodi as a standalone app. By doing this, you can still use your Raspberry Pi for other things, along with having Kodi available whenever you want.
- Turn on your Raspberry Pi.
-
Once loaded, open a Terminal window from your desktop.

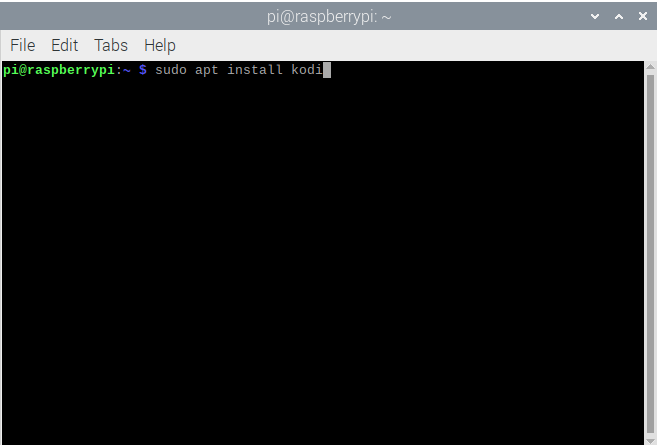
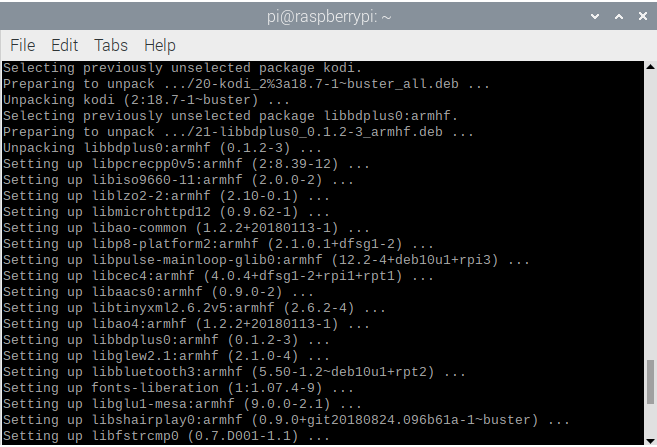
- Type "sudo apt install kodi".
- Press Enter on your connected keyboard.
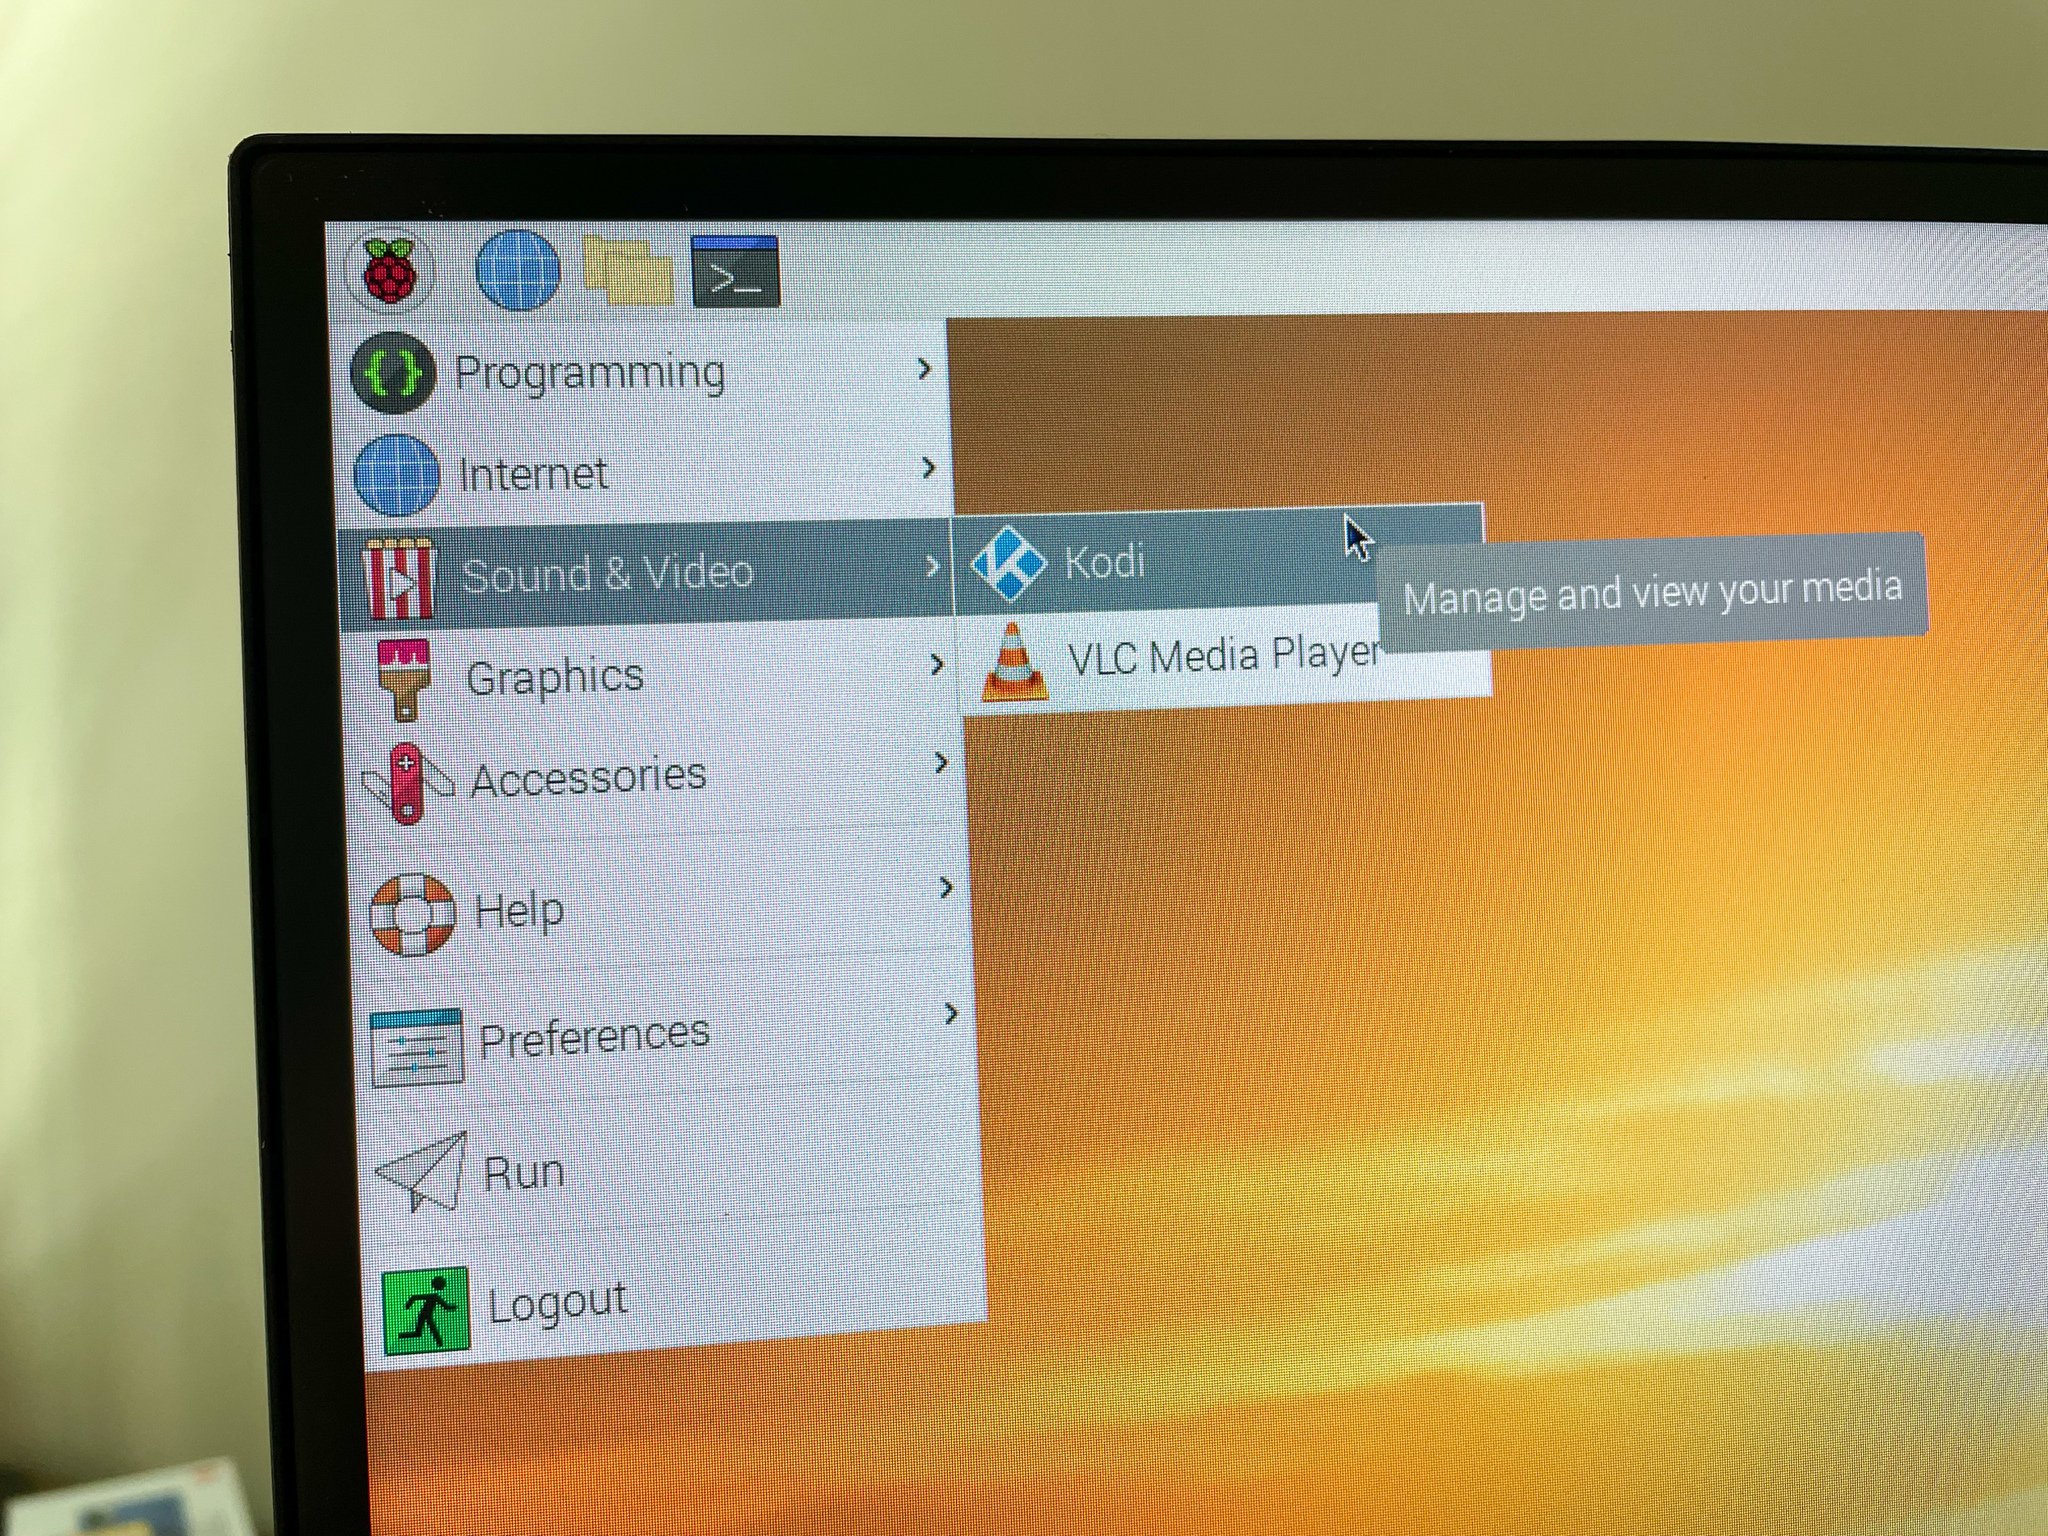
The process should only take around 30 seconds or so, but it will depend on your internet connection speed. Once completed, you'll be able to access the Kodi app from the Menu bar, under Sound & Video
How to use Kodi on a Raspberry Pi
There are some things you'll want to do to get started watching video content and listening to music through your new Kodi box. You might need to buy licenses for MPEG-2 and VC1 hardware decoding. They're cheap and easy to buy over the internet. I think you should spend a few bucks to buy them instead of finding other ways to acquire them.
Kodi integrates into any home media system.
You might also want to set up Plex and the PleXMBC add-on to decode and stream video to your new Kodi box. Kodi is a player that can attach to your storage or countless streaming servers via the internet. If you have a large media library of your own, Plex is an easy-to-setup media server that works great with Kodi to watch and listen to everything you have.
You can also install support for your own DVR backend or an HDHomeRun tuner or set things up to watch recorded PlayOn streams. Look at the Add-ons settings for all the legal and Kodi project-approved ways to get content from the internet to your screen. Of course, there are plenty of places on the internet to get more information about services you can add to Kodi, but we'll let you find those on your own.
The next step is to lean back and enjoy it.
Everything you need
CanaKit - Raspberry Pi 4 Basic Kit
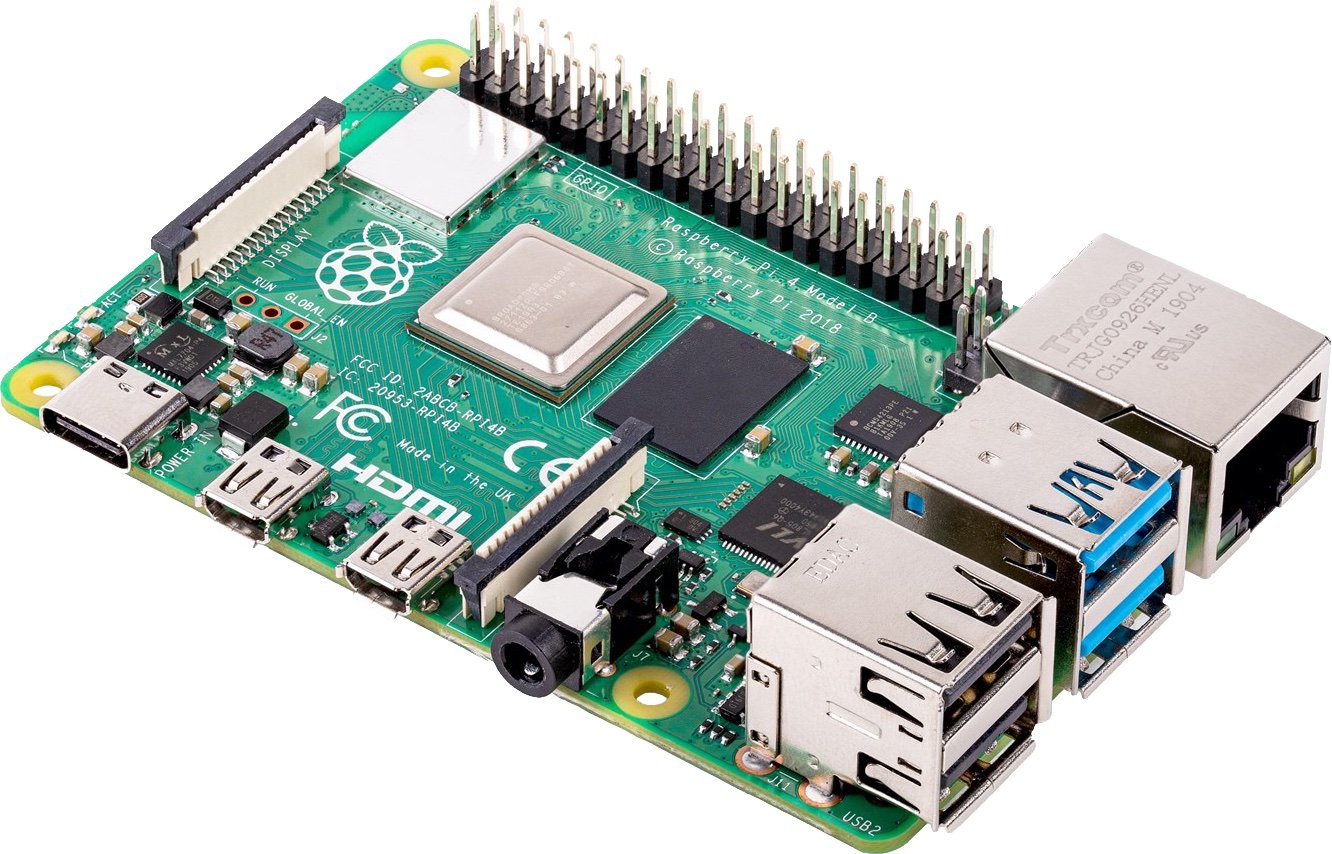
The new Raspberry Pi 4 is a significant improvement over the 3 B+, and with this kit from CanaKit, you'll have everything you need to install and use Kodi on the Raspberry Pi. The kit includes a case, power supply, and heat sinks. From there, you'll just need a keyboard, mouse, and microSD card.
Source: androidcentral