Make your life a whole lot easier with these time-saving Google Chrome tips and tricks.
Google Chrome is one of the top internet browsers for desktop, at least according to our readers. It may be a little processor heavy, but when it comes to getting things done it can be very useful. If you'd like to squeeze even more productivity out of Chrome on your PC, here are some nifty tips and tricks for Google Chrome.
Tip 1: Use Tab Groups

The first thing you'll want to do is clean up the mass open tabs crowding up your Chrome Browser. Luckily, you now have the ability to create Tab Groups. You can then collapse or expand a set of tabs under each individual group.
To create a Tab Group, simply right-click on a Chrome tab and select Add tab to new group. Choose a name and color for your newly created group. Once your Tab Group is all set, you can declutter Chrome. Click on the group's name to collapse it and vice versa to expand it.
Tip 2: Search tabs
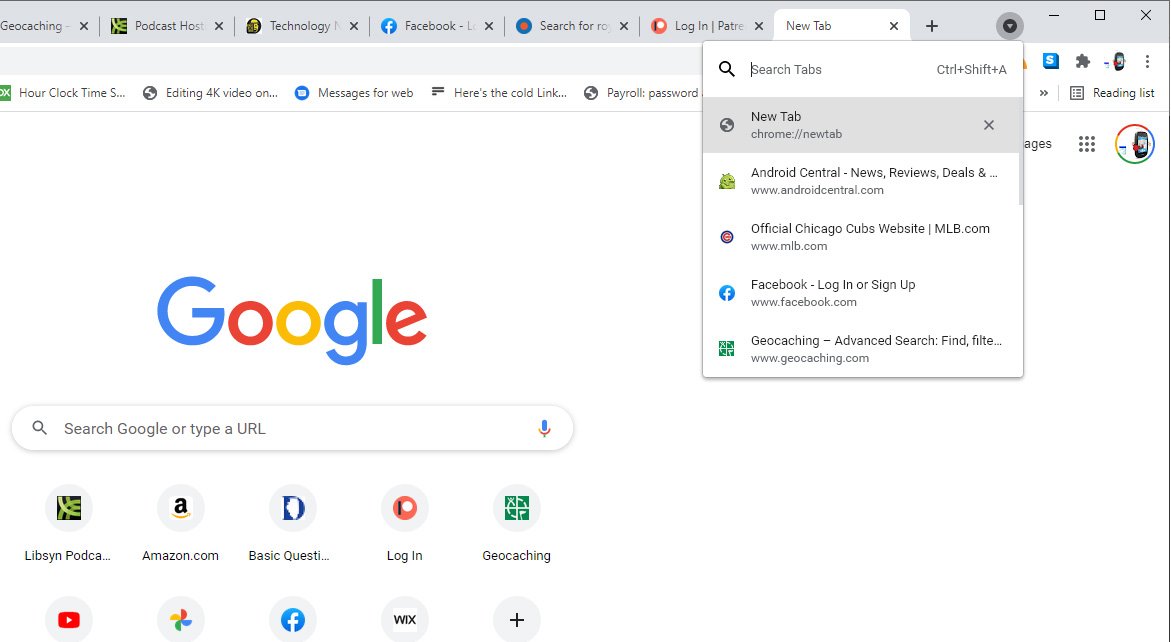
After a couple of hours working on your laptop, you may get lost in an ocean of tabs on Chrome. If you want to look for a specific tab real quick, you can simply search for the tab. Locate the little downwards pointing arrow on Google Chrome and click on it.
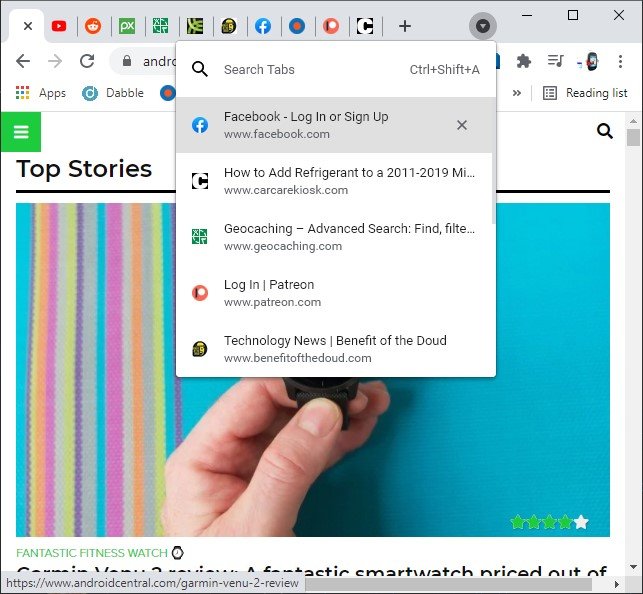
Once you've clicked on the arrow, you'll find a small search bar. Type in the name of the tab you're looking for and it'll appear.
Tip 3: Live Caption
Closed captions are incredibly crucial to folks with impaired hearing or other disabilities. To make it easier to follow audio and video content on your browser, you can turn on Live Captions. Here's how you can do that.
First, click on the three dots in the upper right corner of Google Chrome. A drop-down menu will open up where you need to select Settings. Once Chrome opens up the settings tab, click on Advanced and then choose Accessibility. Here you'll have to toggle on the Live Caption feature.
Tip 4: Restore tabs
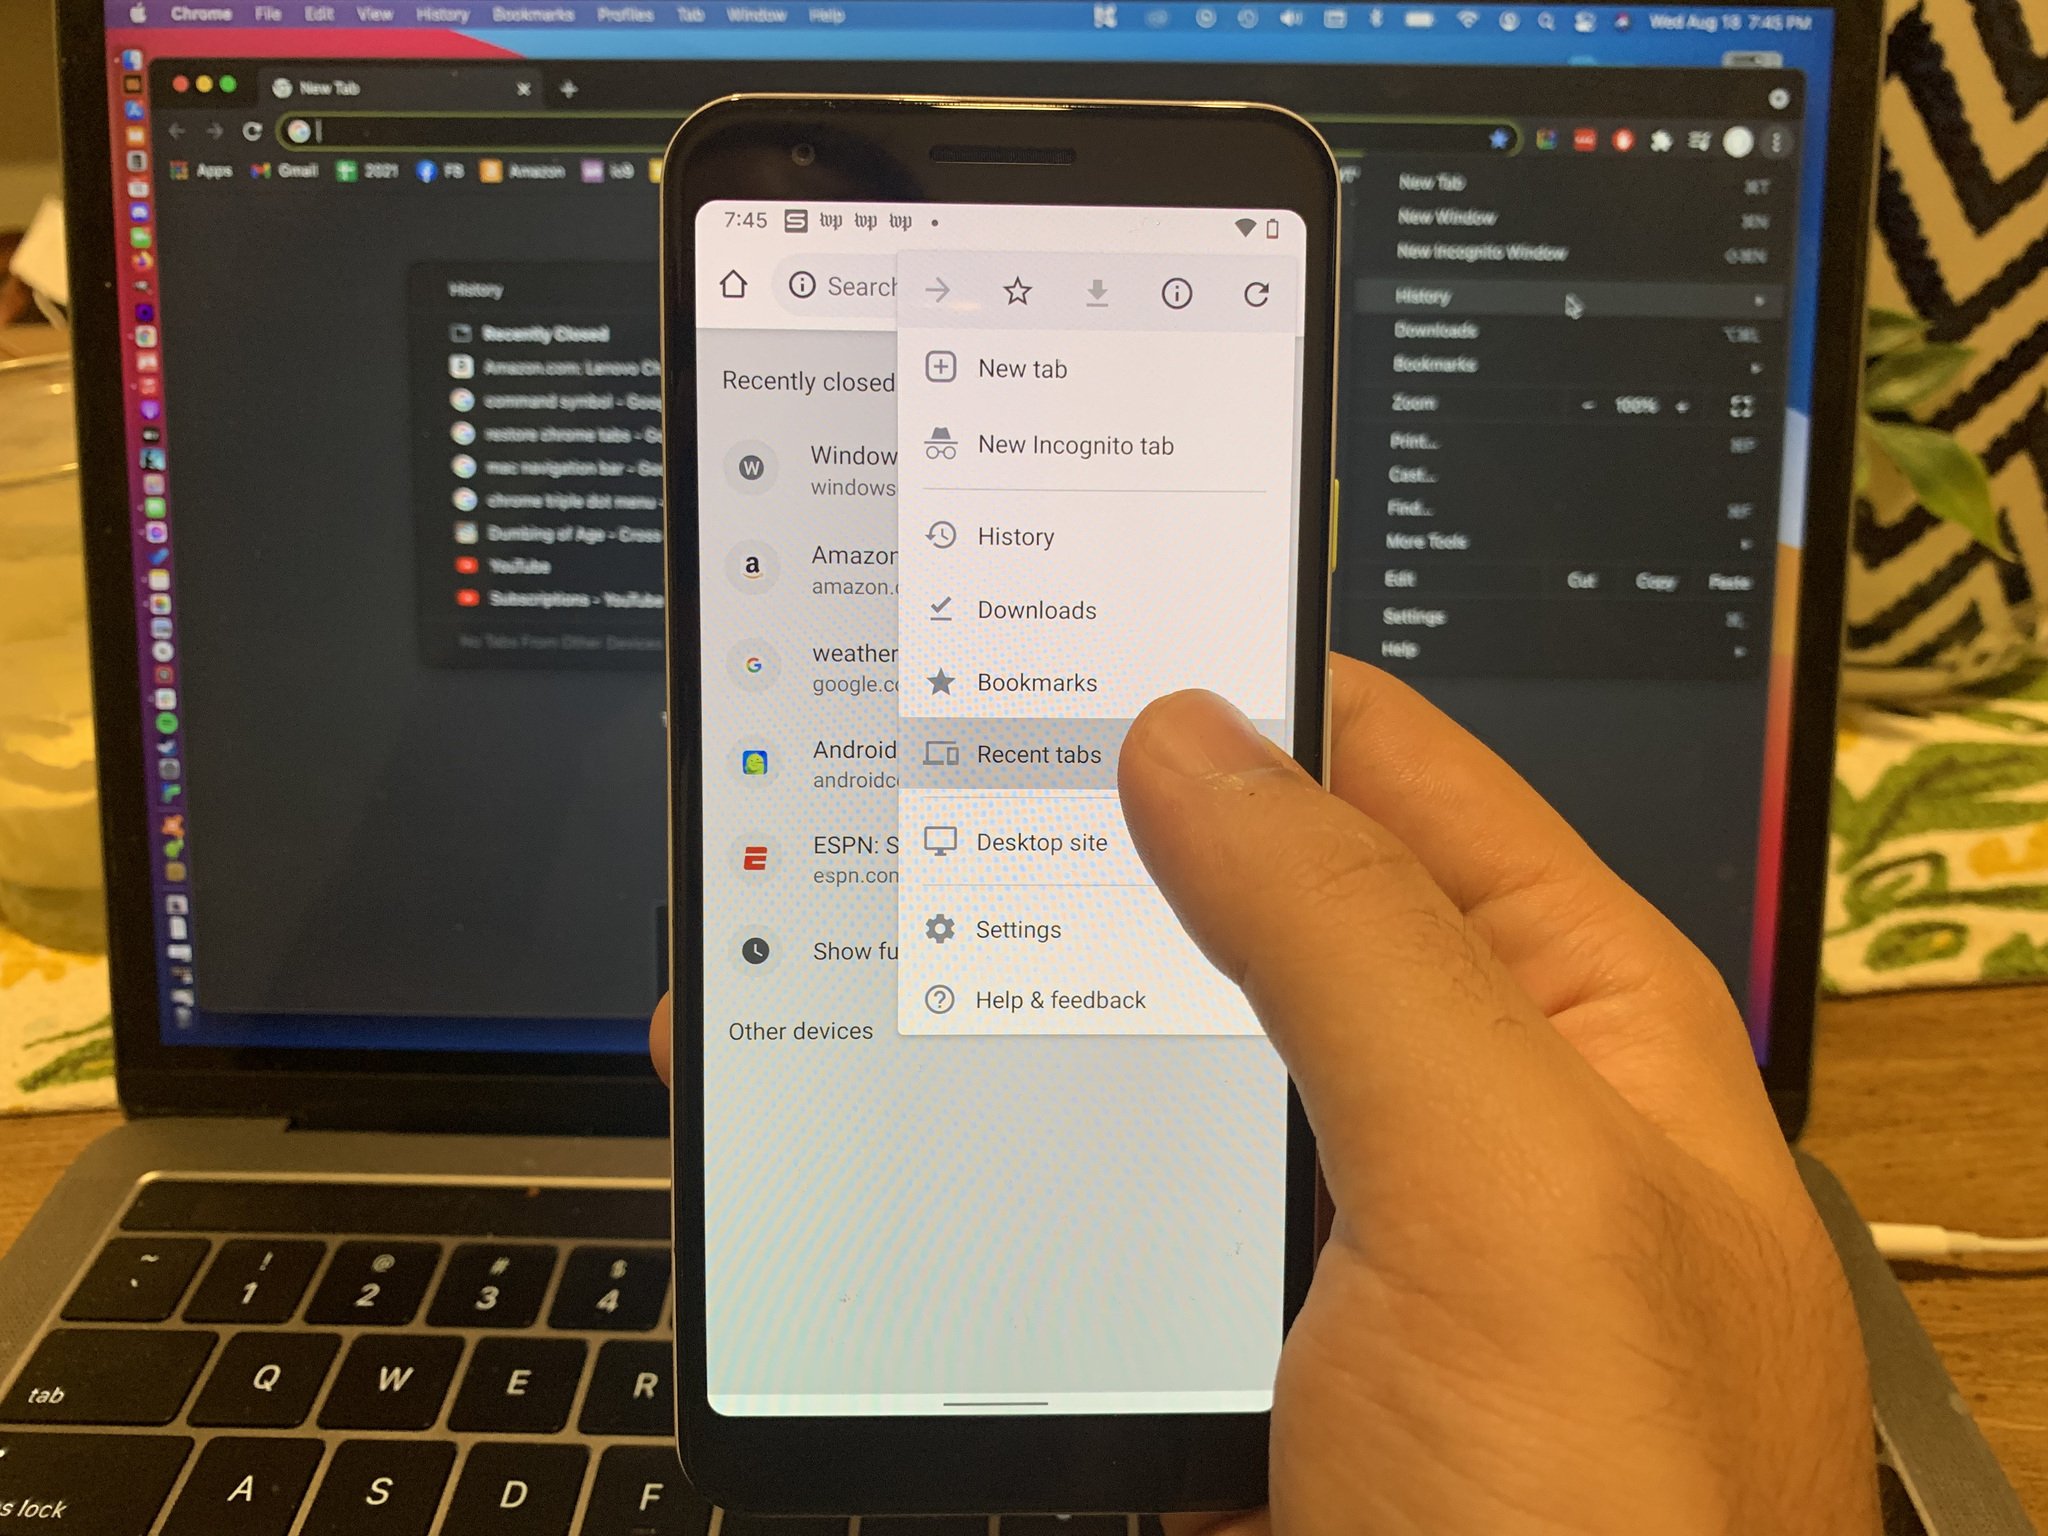
Chances are, you've all faced sudden computer crashes or power outages during extreme weather conditions. When your PC shuts off with no warning halfway through work, the most annoying part can be losing all your Chrome tabs. There's no need to lament over your loss because there is a way to restore those tabs.
Once again, the first thing to do after rebooting your PC is clicking on those three dots in the upper right corner. Next, hover your cursor on top of History and voilà, a Recently Closed tabs option will appear. You can browse through the list and re-open any tab.
Tip 5: Switch profiles
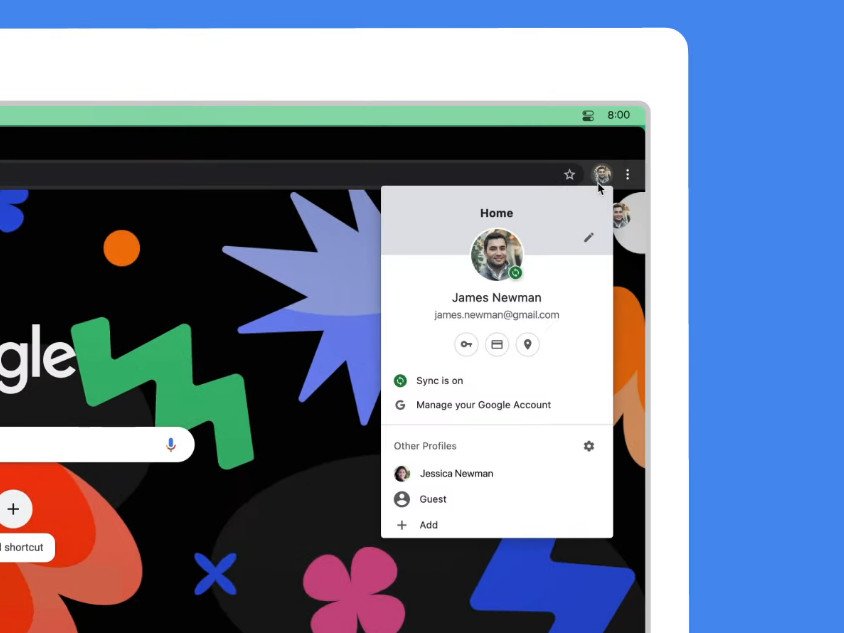
If you're a student or a working professional, chances are you've got multiple Google accounts. It is not a wise idea to use your work profile for personal use or the other way around. Google allows you to create completely separate user profiles for Chrome to avoid the mix-up.
In order to create a new user profile on Google Chrome, first you need to open your account settings. To do so, click on the three dots in the top right corner of the browser. Select Add to setup your new Chrome profile with or without another Google account. Next time you open Chrome, it will ask you select a profile upon startup.
Tip 6: Read Later

We're all familiar with the bookmarks bar in Google Chrome. If you would like to read an article later but don't want to add it to your favorites, you can choose to put it in your Reading list. It is like a secondary set of 'favorites' that aren't as important, such as news pieces or supplementary research for a project.
Adding links to your Reading list is pretty straightforward. Simply right-click on any tab in Chrome and select Add tab to reading list. This reading list can be accessed at any time from the upper right corner of Chrome, just beneath the your account settings.
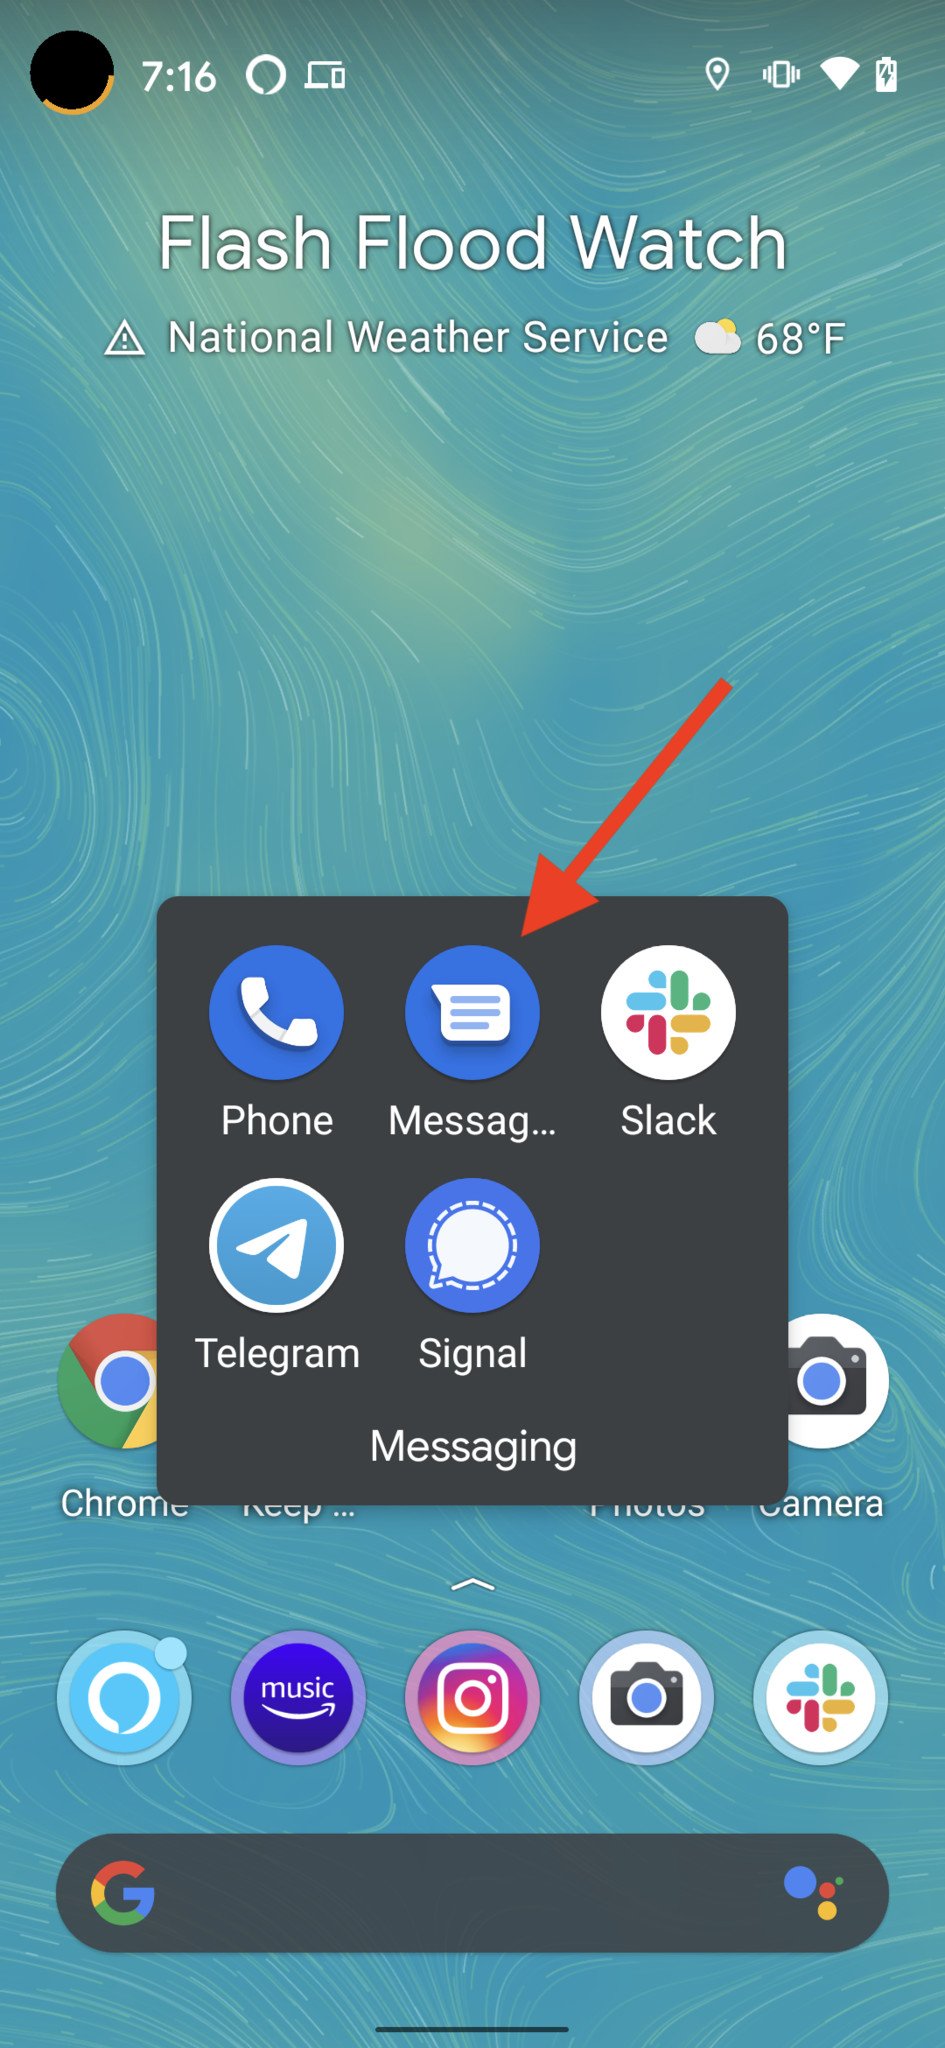
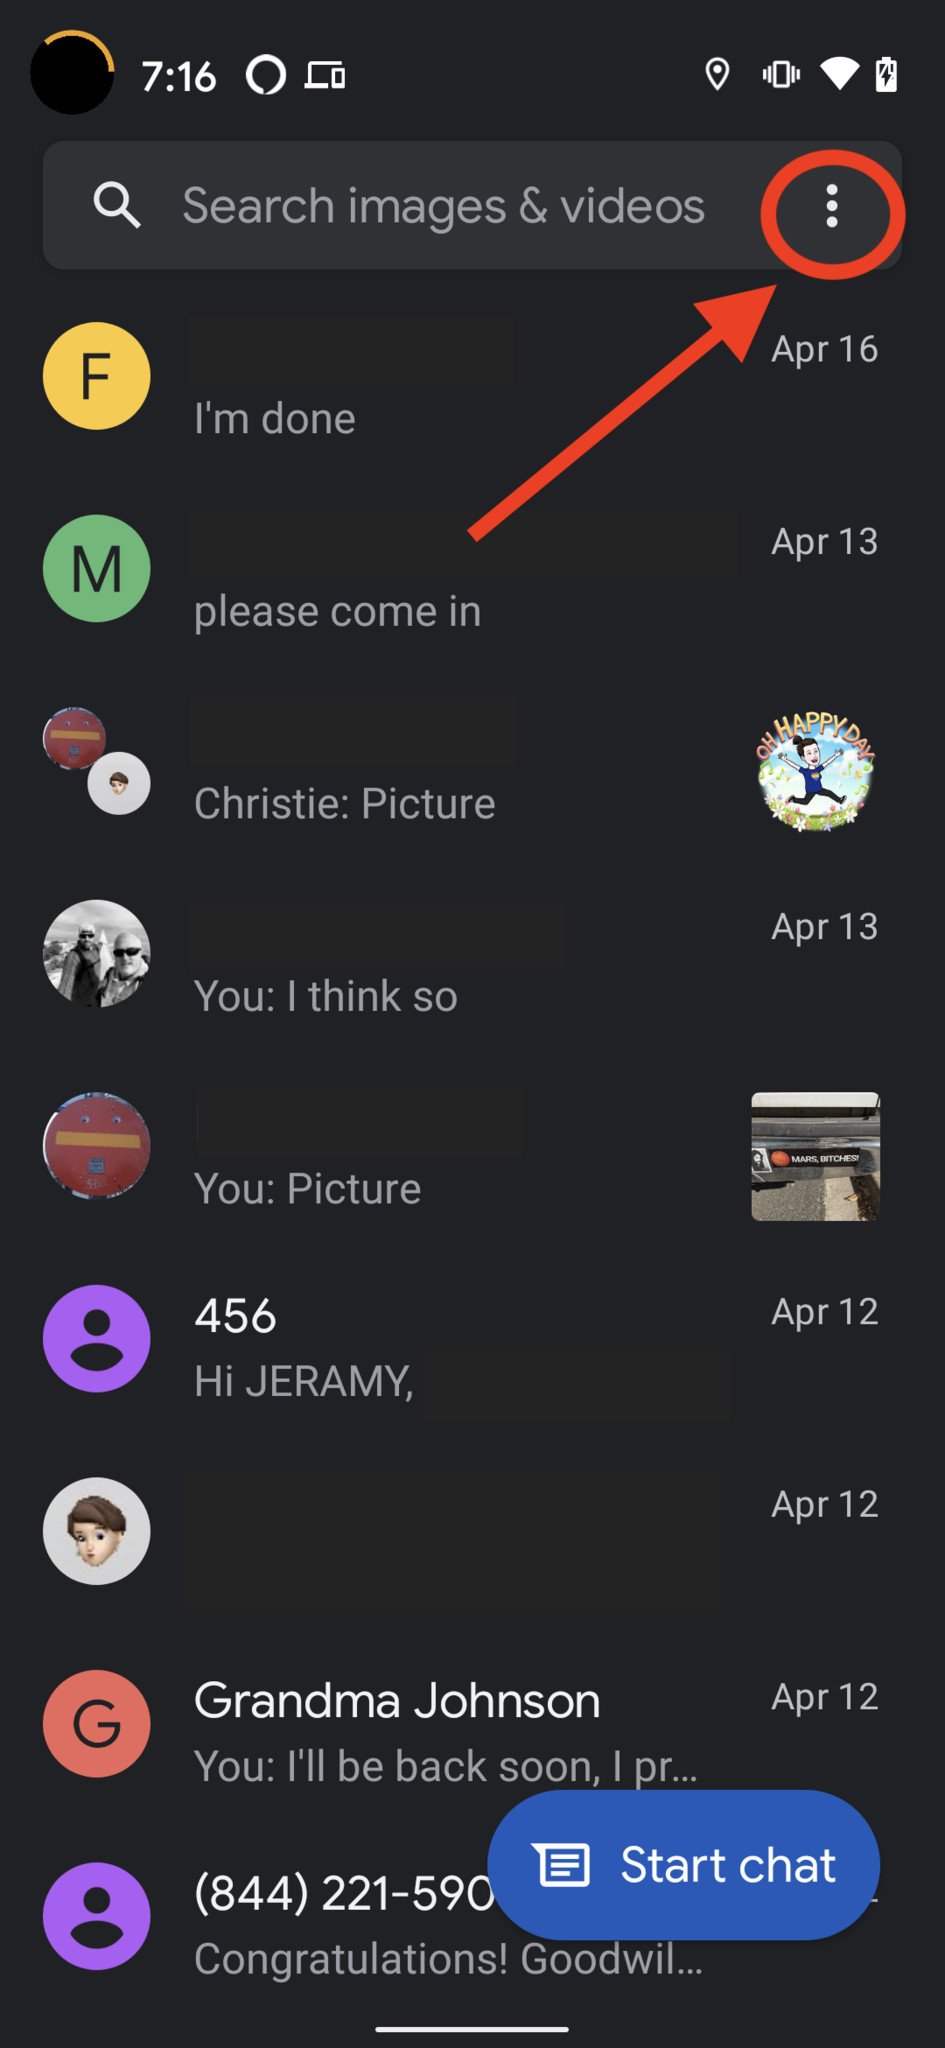
Tip 7: Use Google Messages
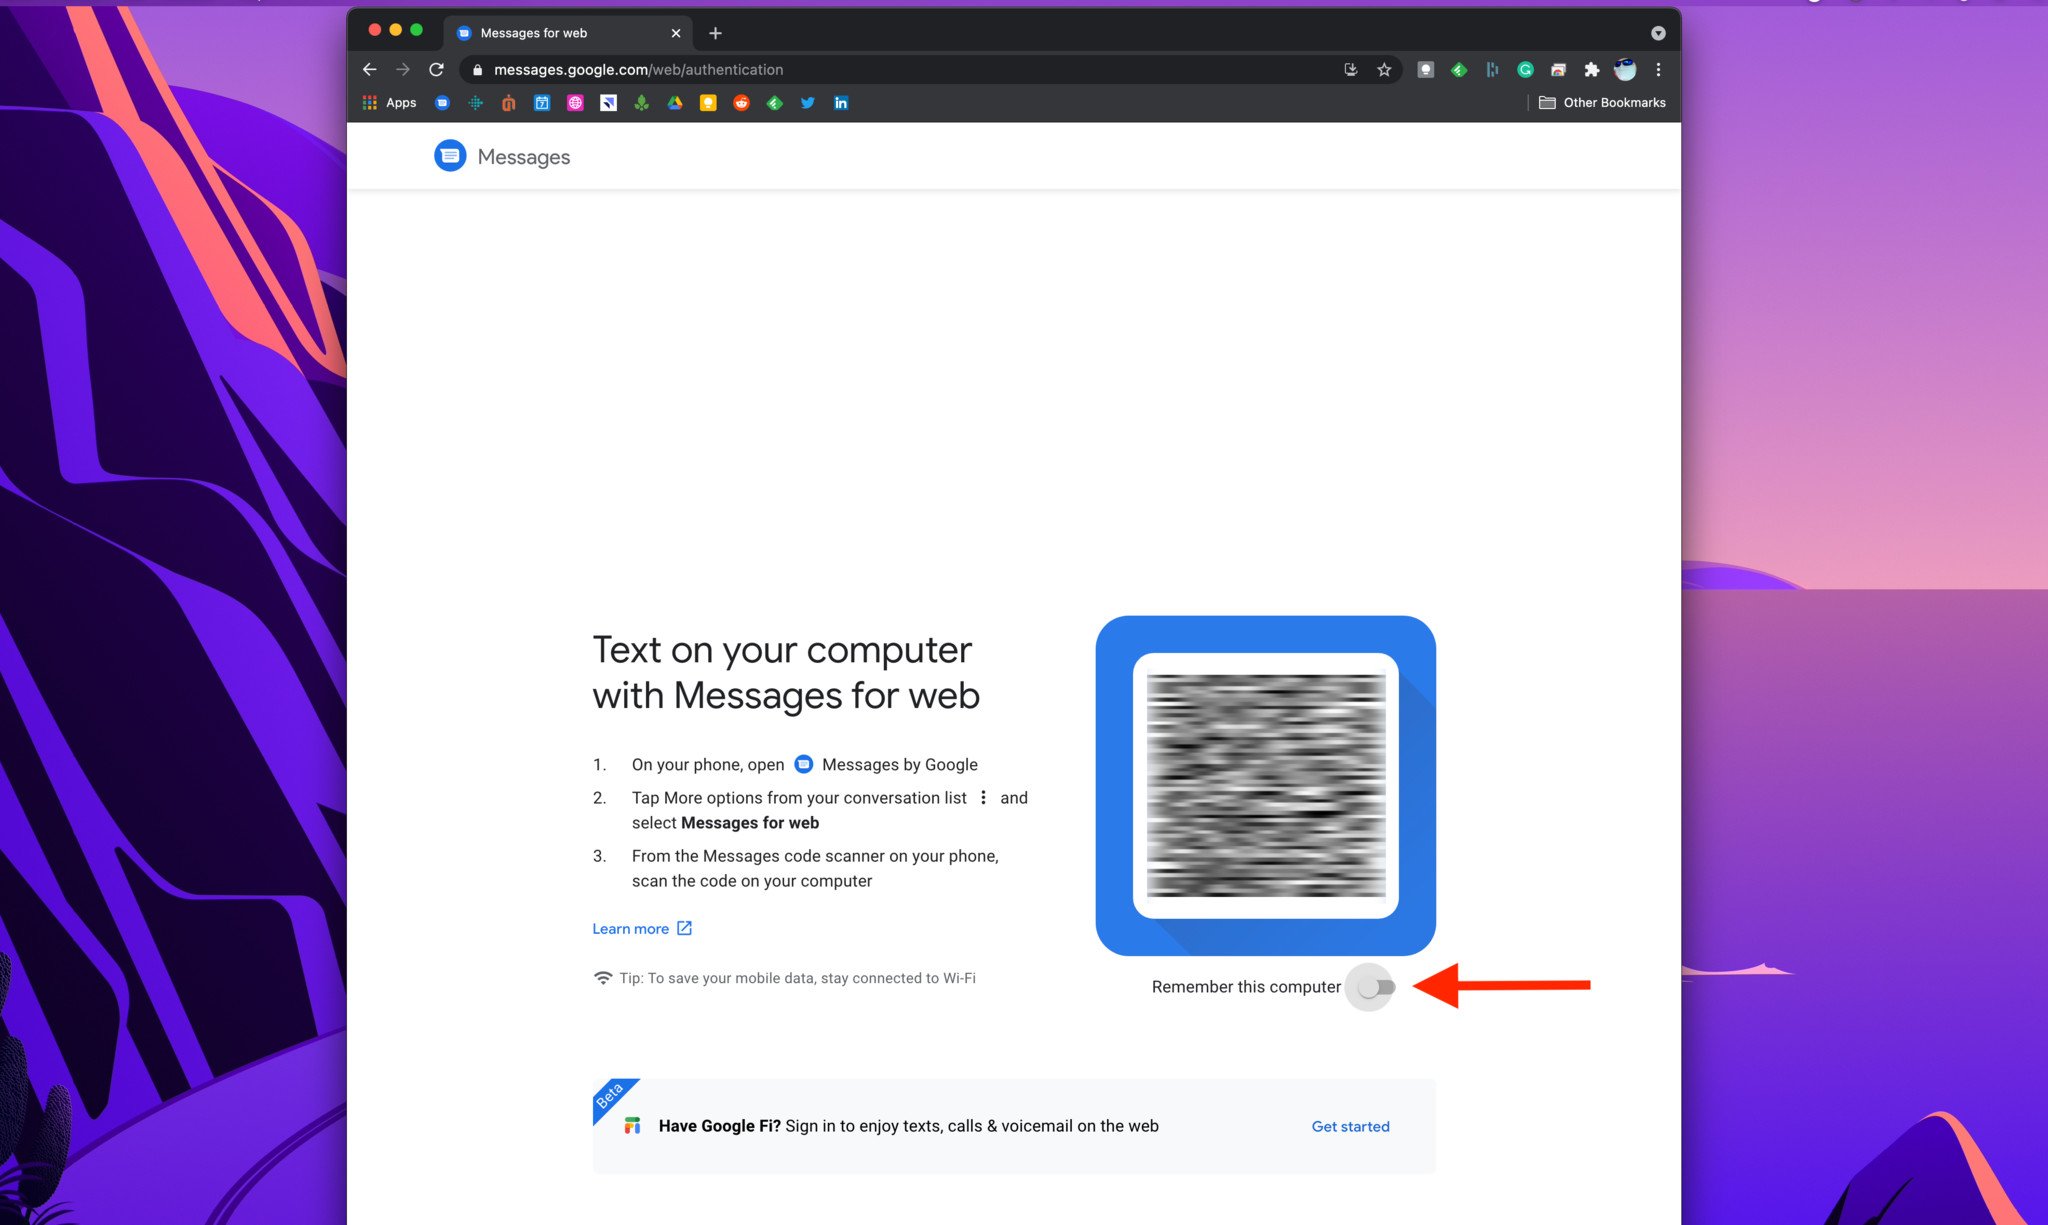
Constantly checking your phone while working on your computer can be extremely distracting. A better way to balance office hours with your private time is to use Google Messages from your Chrome browser. That way, you won't be tempted by nonsensical cat memes your friend just sent you.
To view and respond to Google Messages, go to messages.google.com on your Chrome browser. Open the Google Messages app on your phone. Next, tap the three dots in the upper right corner of the app and select Messages for web.
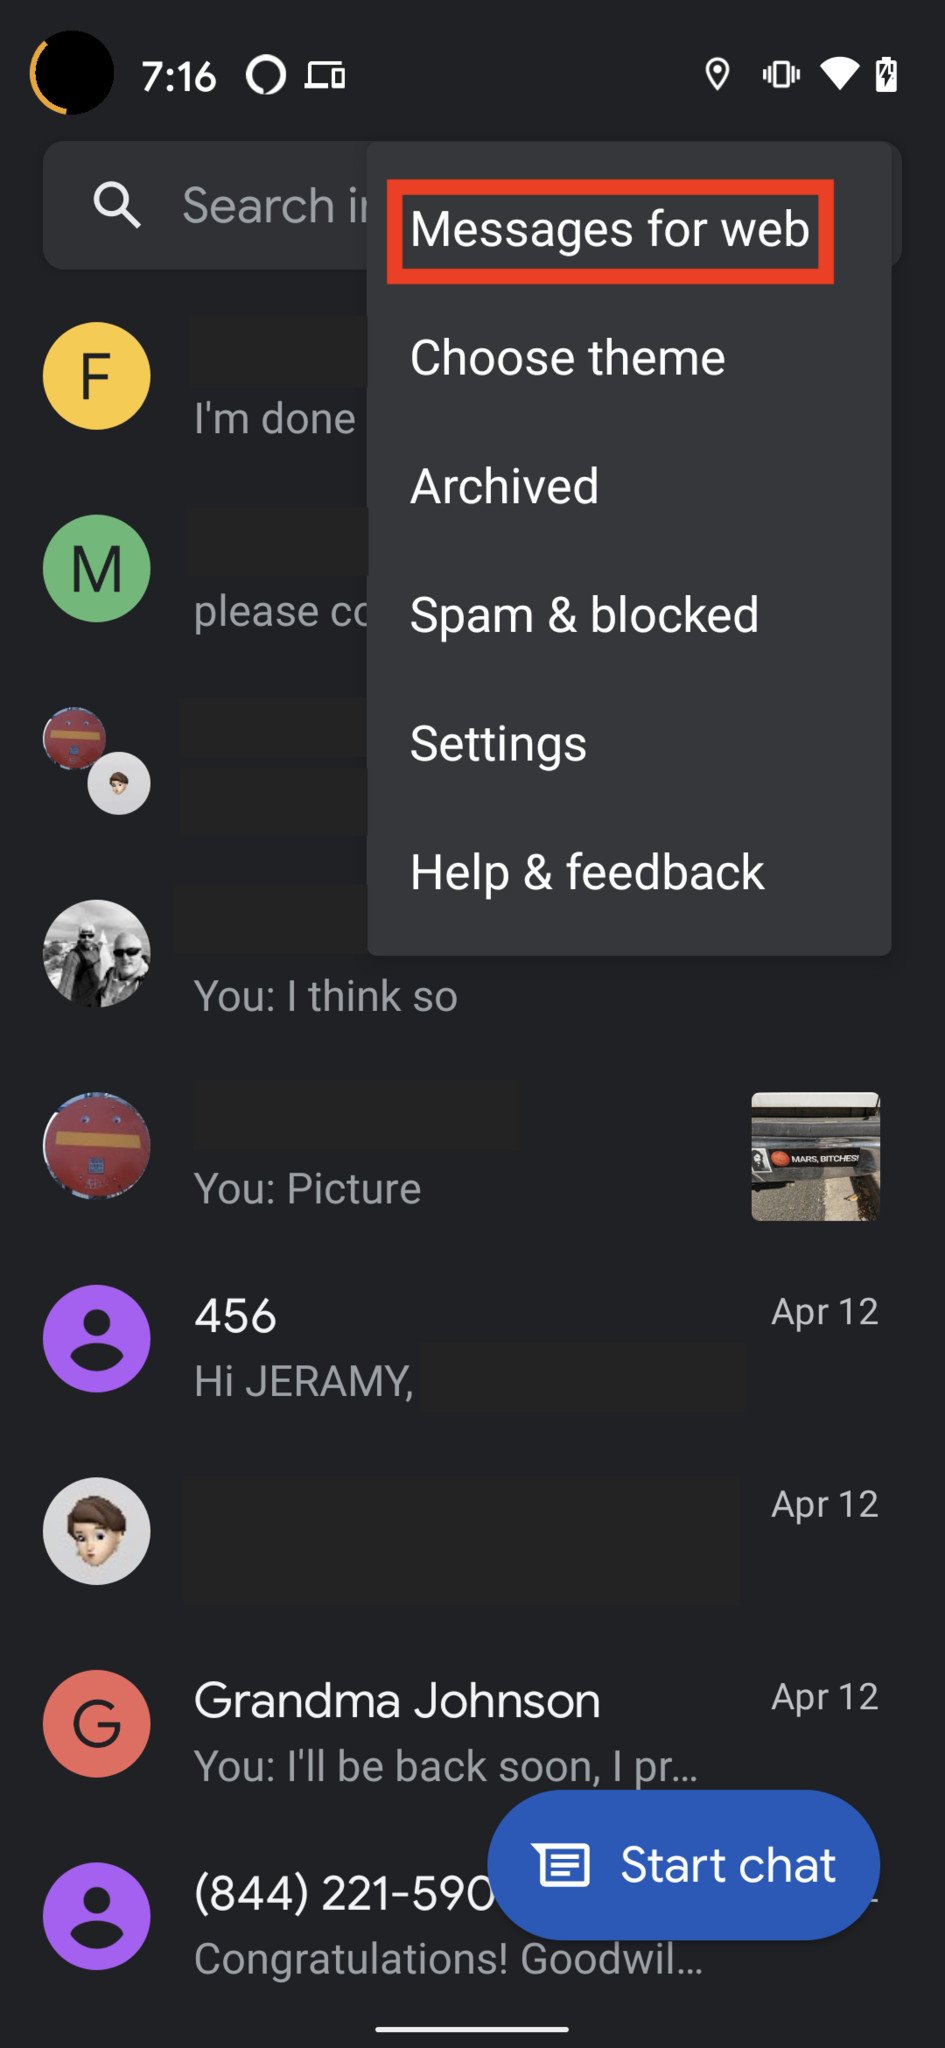
After you've done that, tap on QR code scanner and scan the barcode displaying on messages.google.com in Google Chrome. If you'd like to save yourself the hassle of re-doing this process every time you want to access Messages, select Yes when Google Messages asks you whether it should Remember this computer?.
Tip 8: Block site notification popups

Picture this: You are busily tapping away at your keyboard and getting things done on Chrome. Suddenly, an annoyingly irrelevant notification pops up and breaks your focus. For many folks out there, these popups are incredibly irksome. Here's how you can prevent them from showing up.
Locate and click on the three dots in the top right corner of Google Chrome on desktop. Click on Settings and then Privacy and security within the settings menu. Next, click on Site Settings and then choose Notifications. Finally, turn off the toggle for Sites can ask to send notifications.
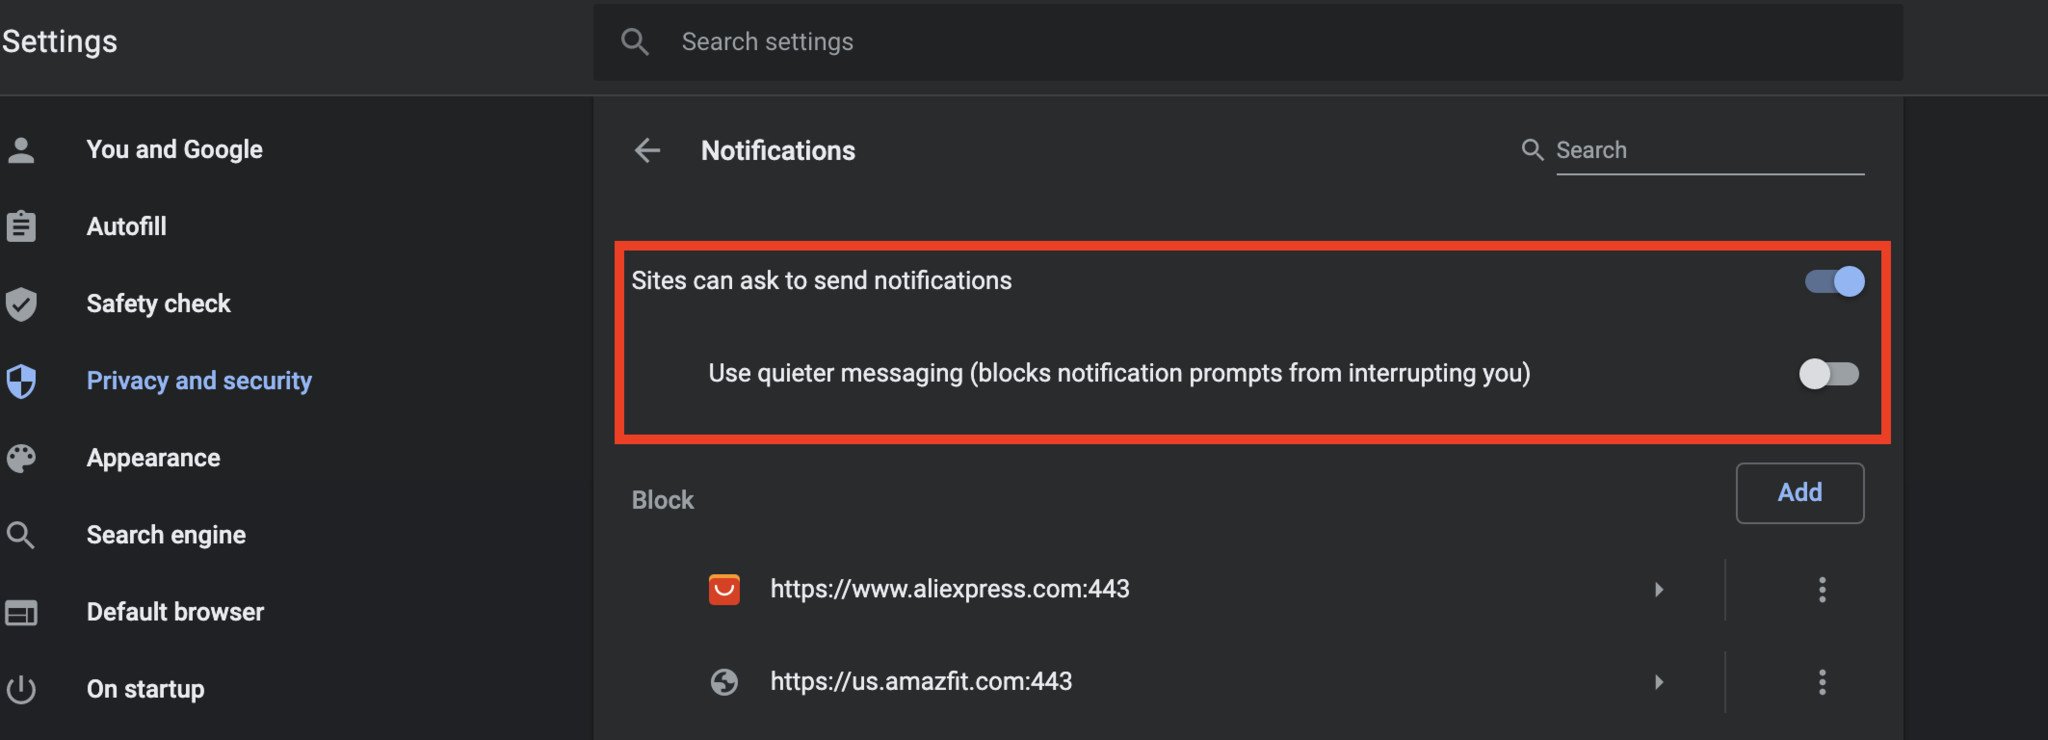
There is another shorter and faster way to accomplish this. You can also type out chrome://settings/content/notifications into the address bar of Google Chrome and hit enter. This will lead you to the same settings where you can turn off Sites can ask to send notifications.
Tip 9: Snooze Google Calendar notifications

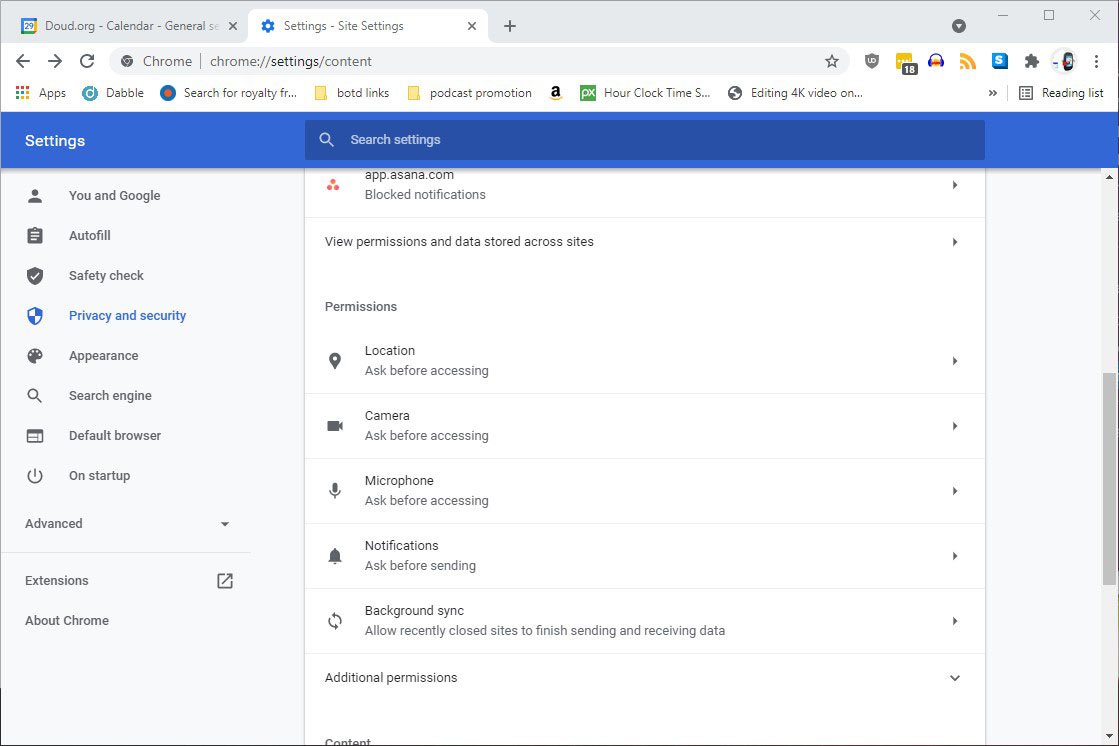
There's a useful little hack for Google Calendar where you can snooze the notifications in Google Chrome. First, you need to check if your Chrome browser has the permission to show you Calendar notifications.
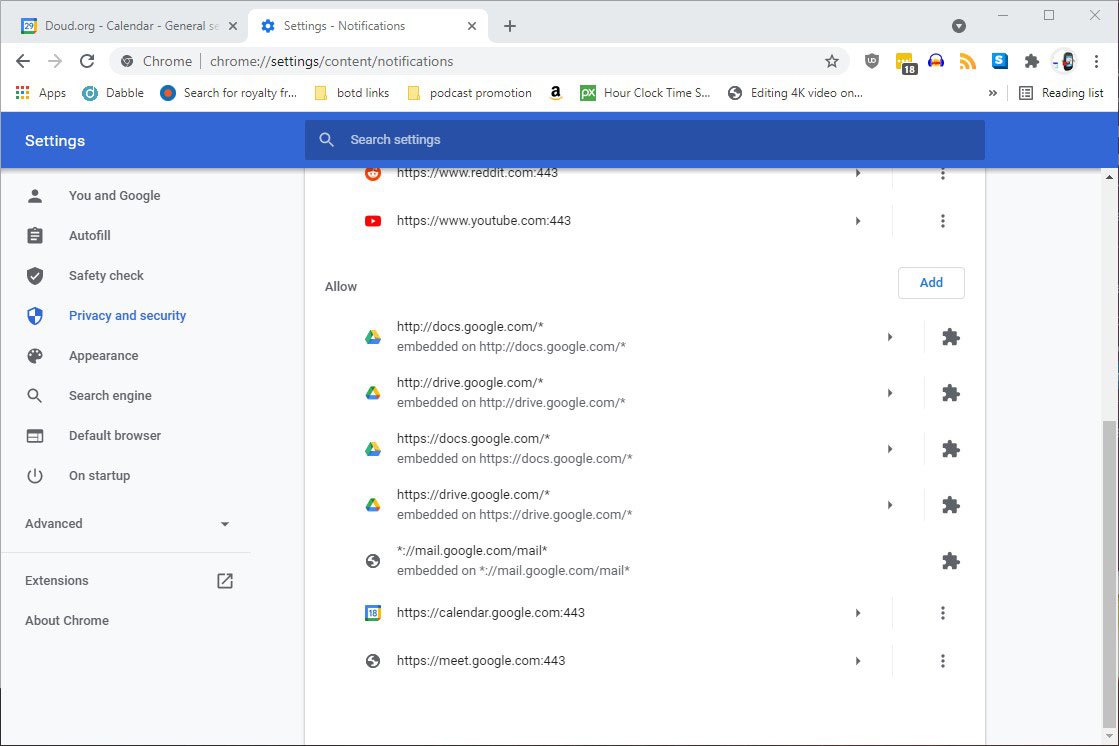
Open Chrome and click on the three dots located in the top right corner. Click on Settings and then again on Privacy and security. There you will need to click on Site settings and find the Notifications option.
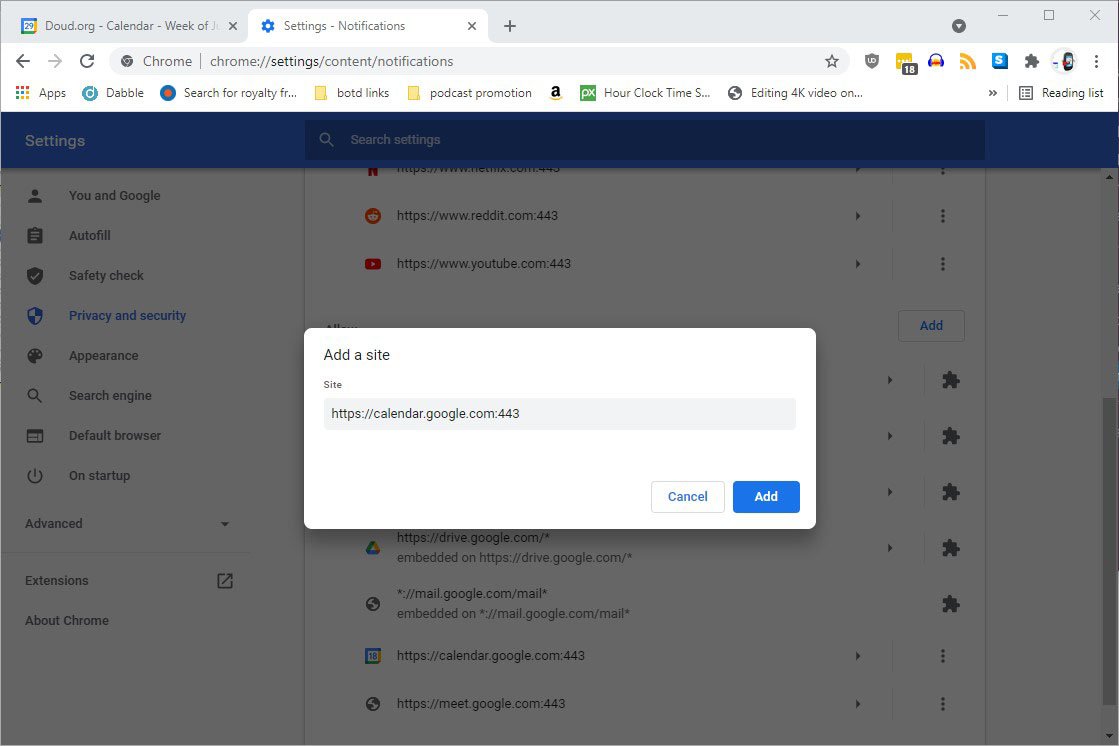
Click on Notifications in the site settings and look for calendar.google.com. When you spot it, make sure it is under the list of permitted sites that are grouped under the Allow heading. If it isn't, click on the Add button next to the Allow heading. A small window will pop up with the title "Add a site". Type https://ift.tt/13trQsu into it and click Add.
After you've done all those steps successfully, you will receive Calendar notifications on your Chrome browser. The notifications will only show up if you have Google Calendar open in a Chrome tab.
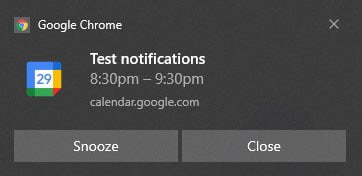
Every time you get a Calendar notification, your Chrome browser will show it too. You can simply click on Snooze to dismiss the notification.
Tip 10: Remove suggestions on new tabs
Google started rolling out some new suggestions cards for some Chrome users recently. These cards appear on new tabs and suggest you recipes or shopping carts based on your Google Chrome history. If you're not a fan of this feature, you can remove the suggestions in a few minutes.
Launch Google Chrome on your PC and open a new tab. Find the Customize Theme button in the lower right corner. Click on Cards and then select Choose Hide all cards to remove all suggestions. Alternatively, you can go through the individual categories and customize your suggestions in new tabs.
Tip 11: Link to highlighted text
Adding to our comprehensive roster of Google Chrome tips and tricks, this is yet another interesting feature. You can highlight any text on a website that's open in a Chrome tab. Once highlighted, you can then share the exact link to that block of text. This beats sharing badly cropped screenshots to prove a point any day.
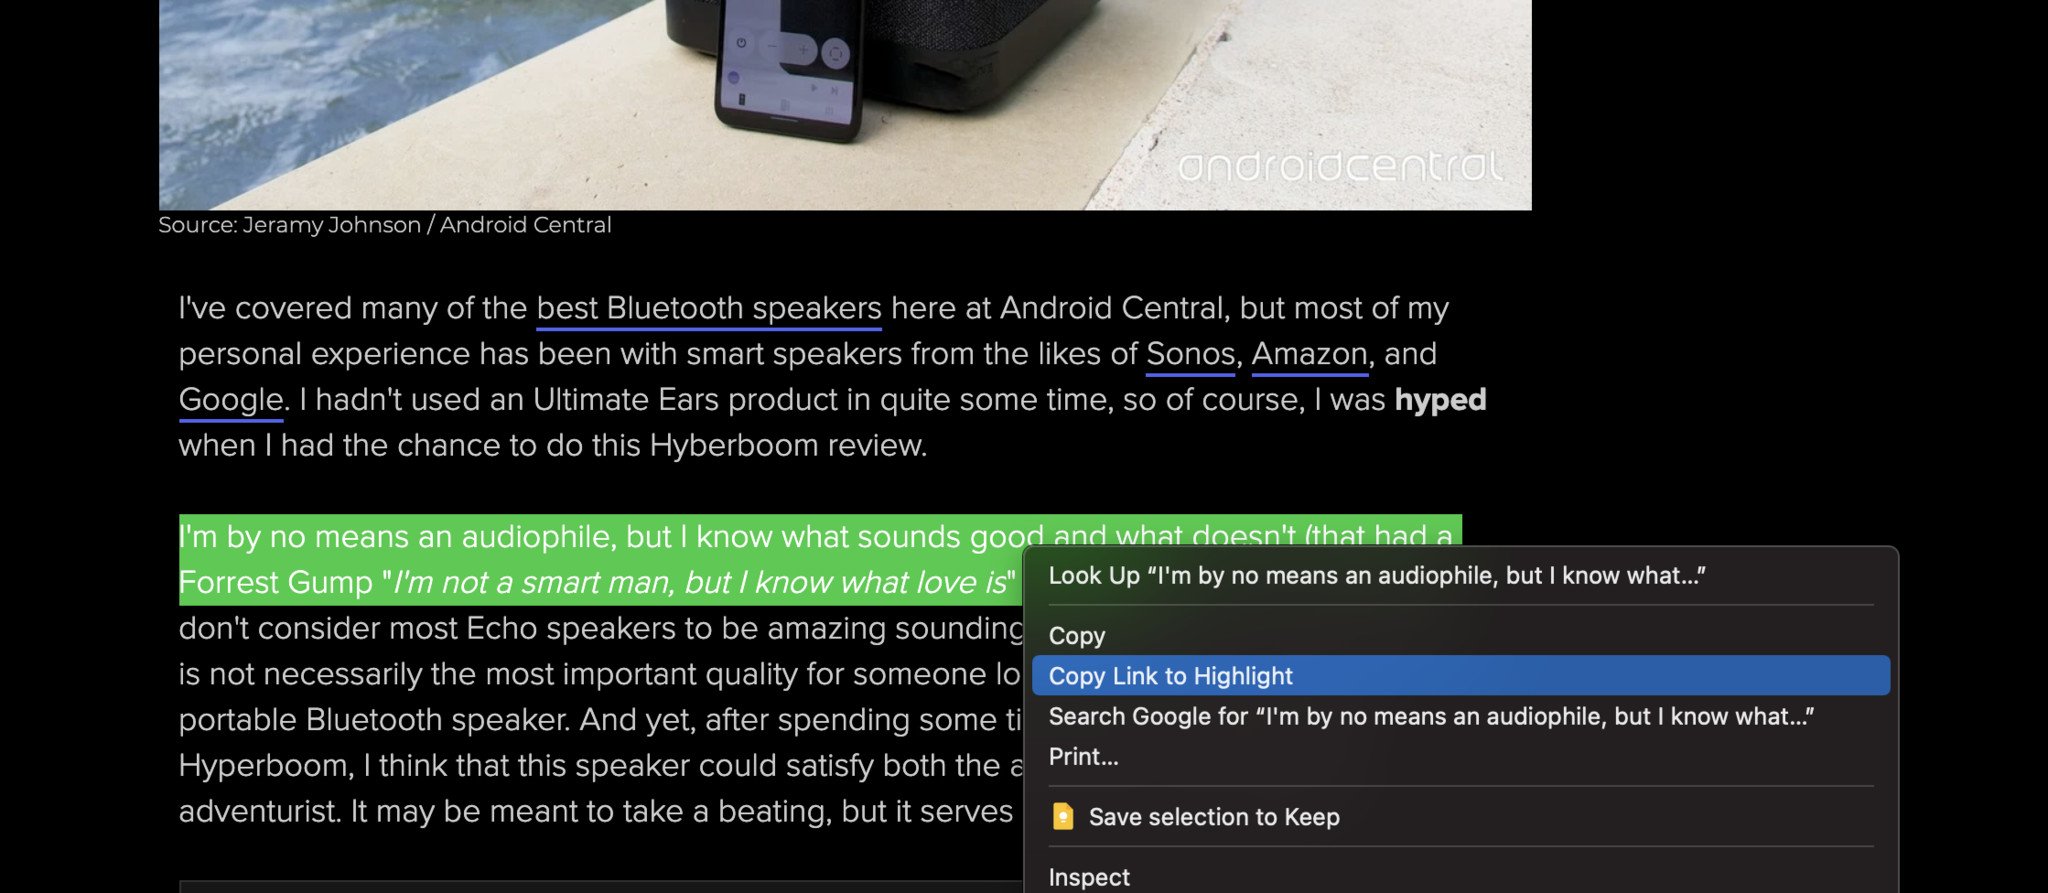
To share the link, first you need to open a website in Chrome. After that, select the text that you want to share. Right-click on that highlighted bit of text you selected. Click on Copy Link to Highlight. You can then proceed to share the copied link with whoever you want.
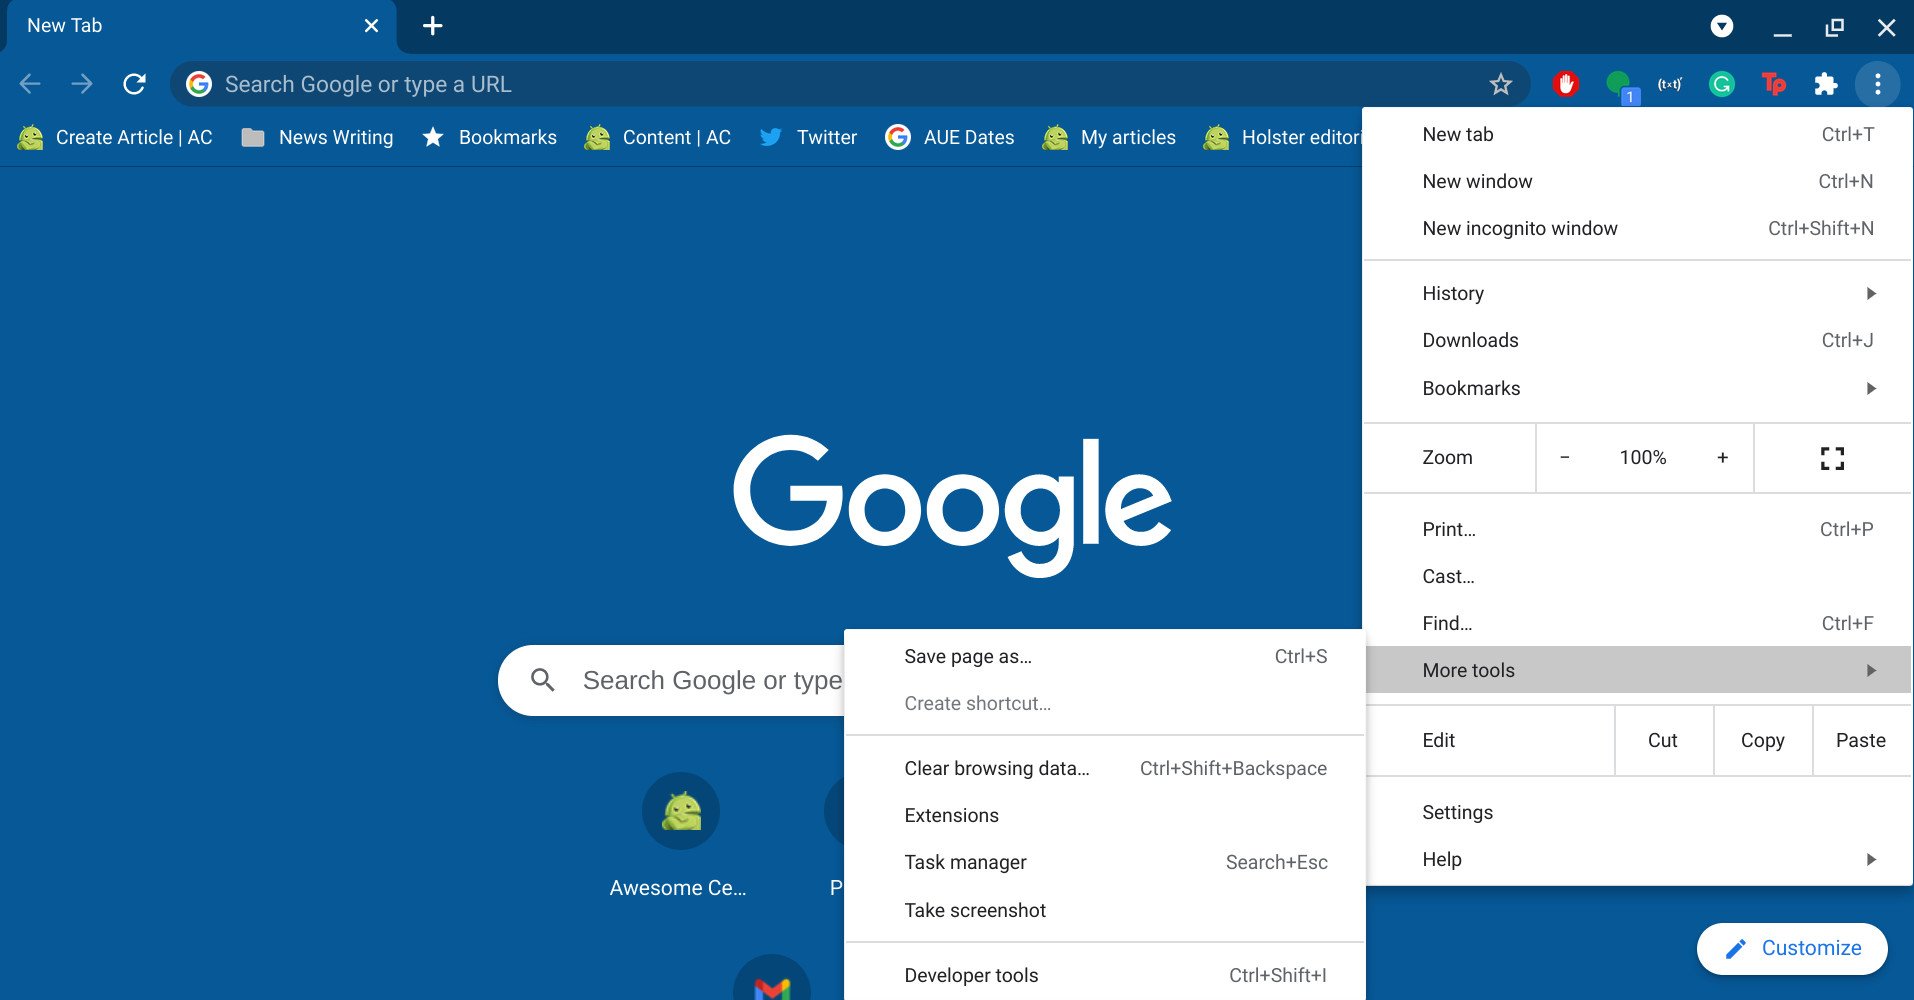
Tip 12: Create shortcuts for extension
![]()
Creating shortcuts is a wonderfully easy way to be more efficient. If you have loads of extensions on your Chrome browser, you can create shortcuts for the ones you use to most. That way you won't have to waste time looking for them under the extensions list.
To create shortcuts for extensions, head over to the upper right corner in Google Chrome and click on the three horizontally aligned dots. Click on the More tools option in the drop-down menu that will open up. Then, select Extensions.
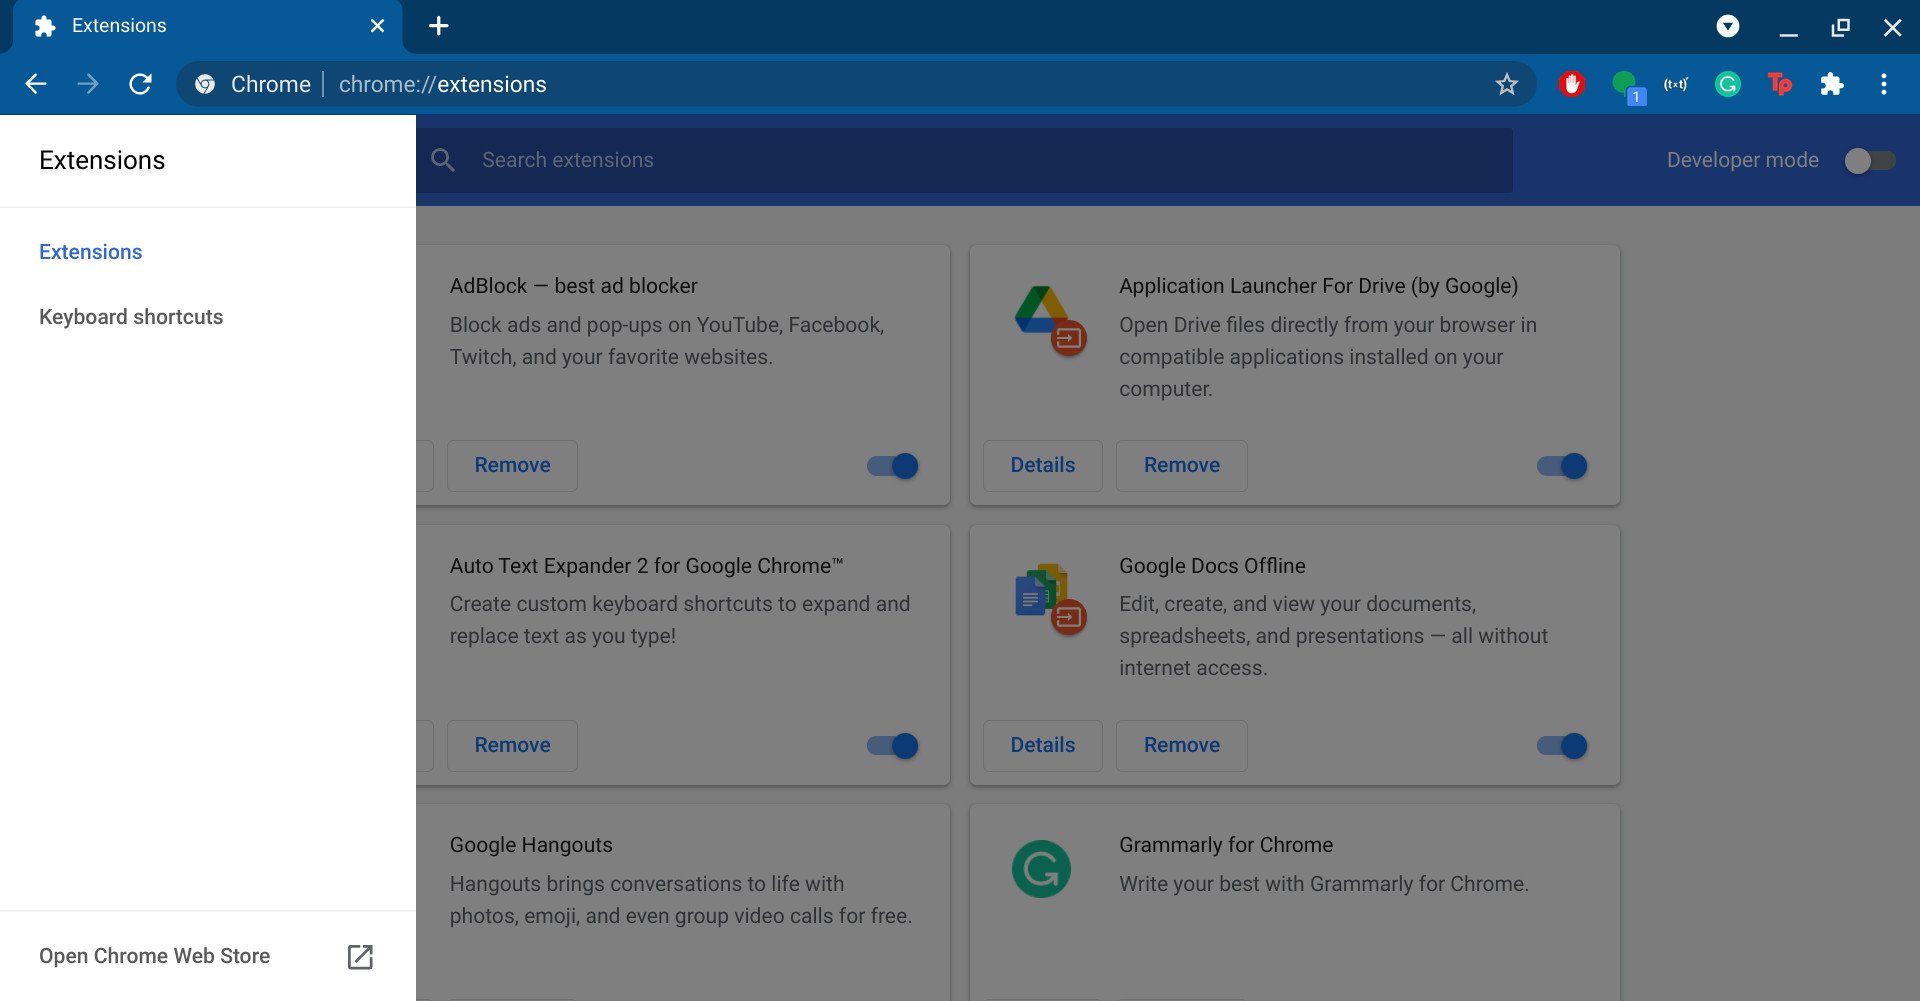
In the Extensions settings page, click on the three lines in the upper left corner. Find the Keyboard shortcuts and click on it. A list of all your Chrome extensions will open up. Pick the extension you want to make a shortcut for and click on the pencil next to it.
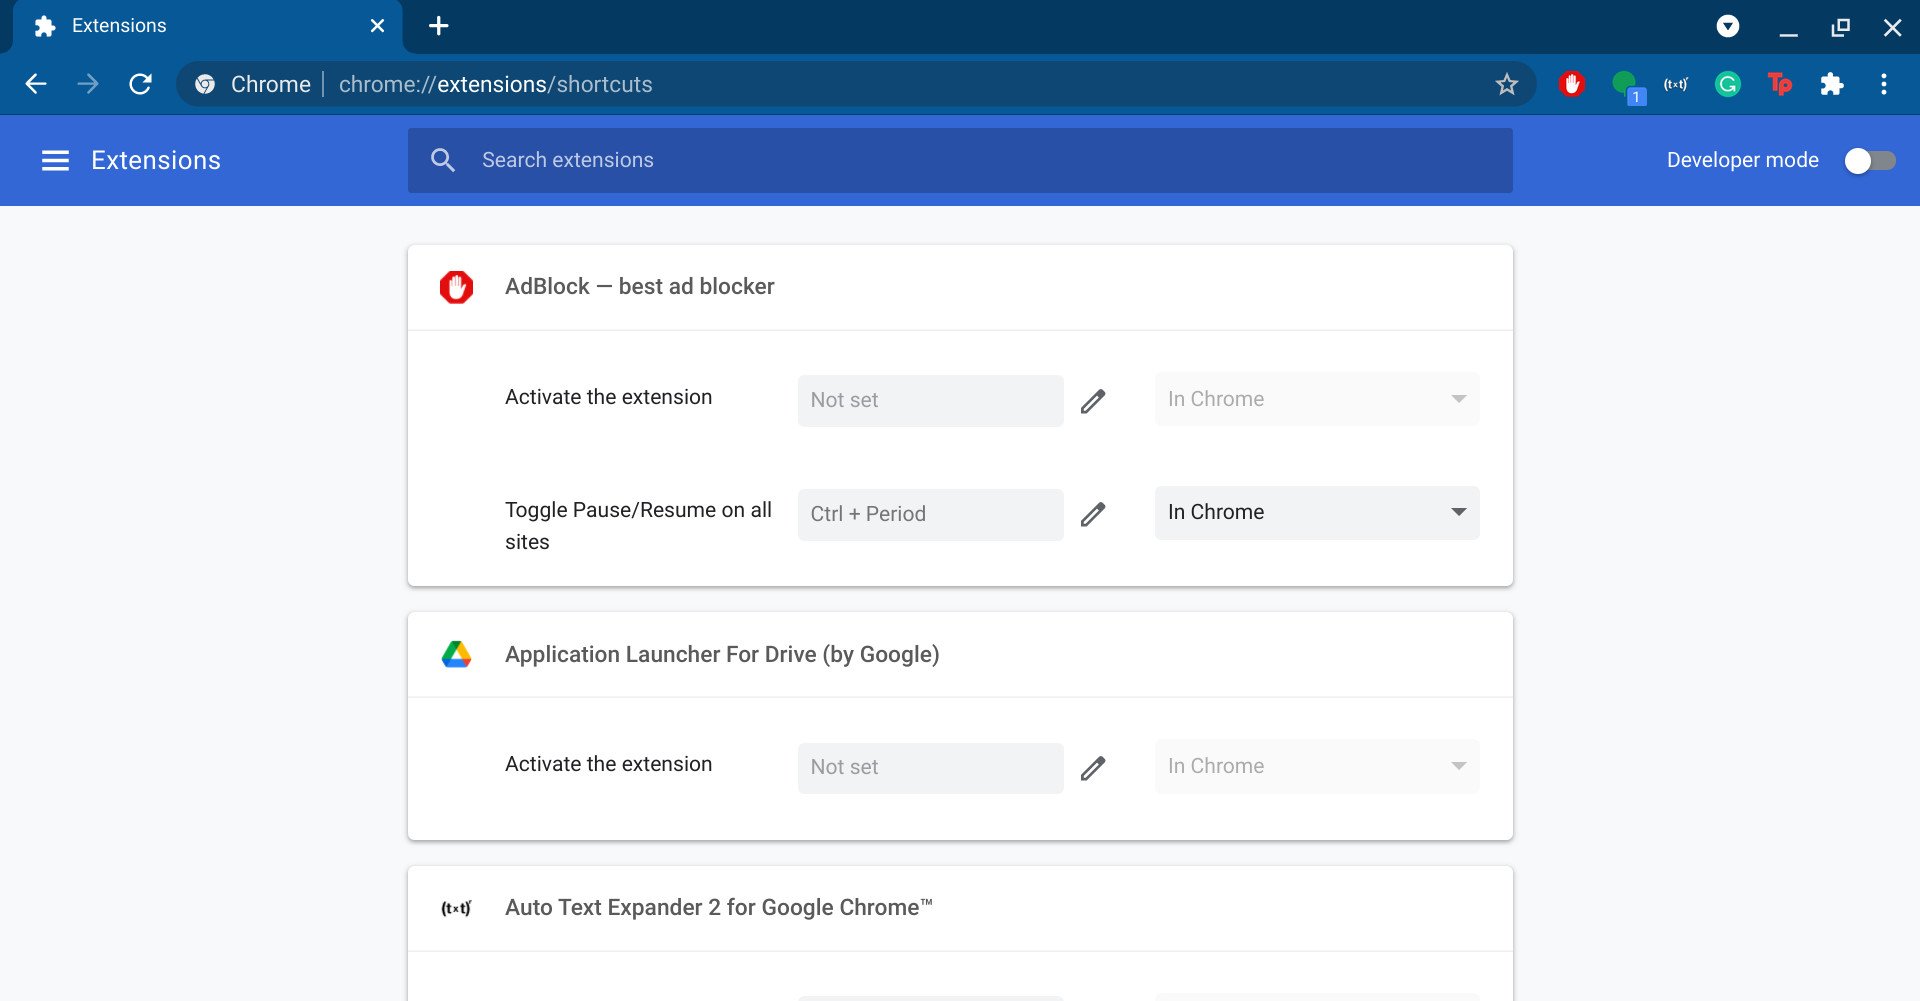
To set the shortcut, press the key combo you wish to use for the shortcut. Keep in mind that the shortcut you just set will only work when you're in an active Google Chrome window.
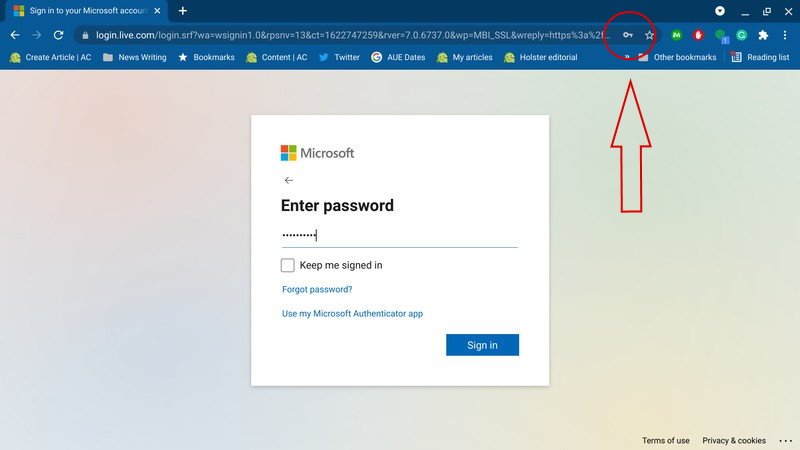
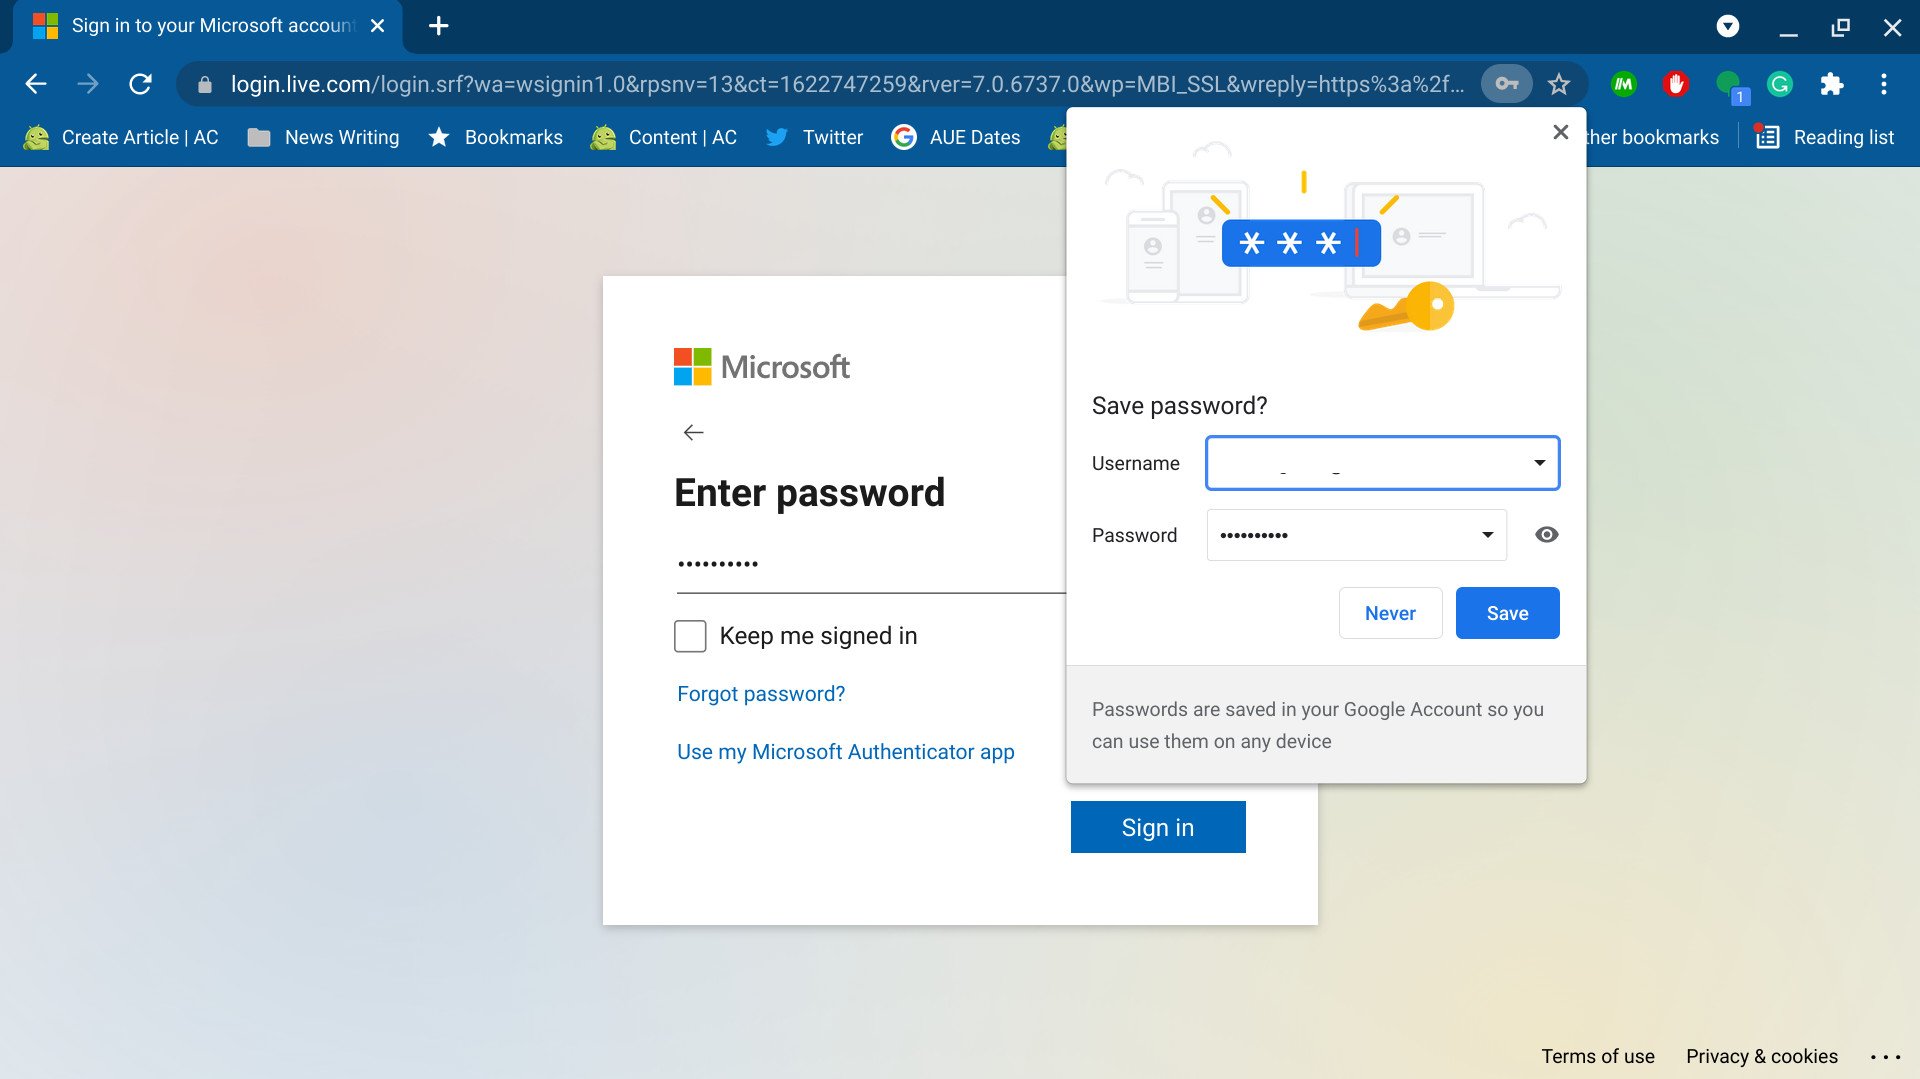
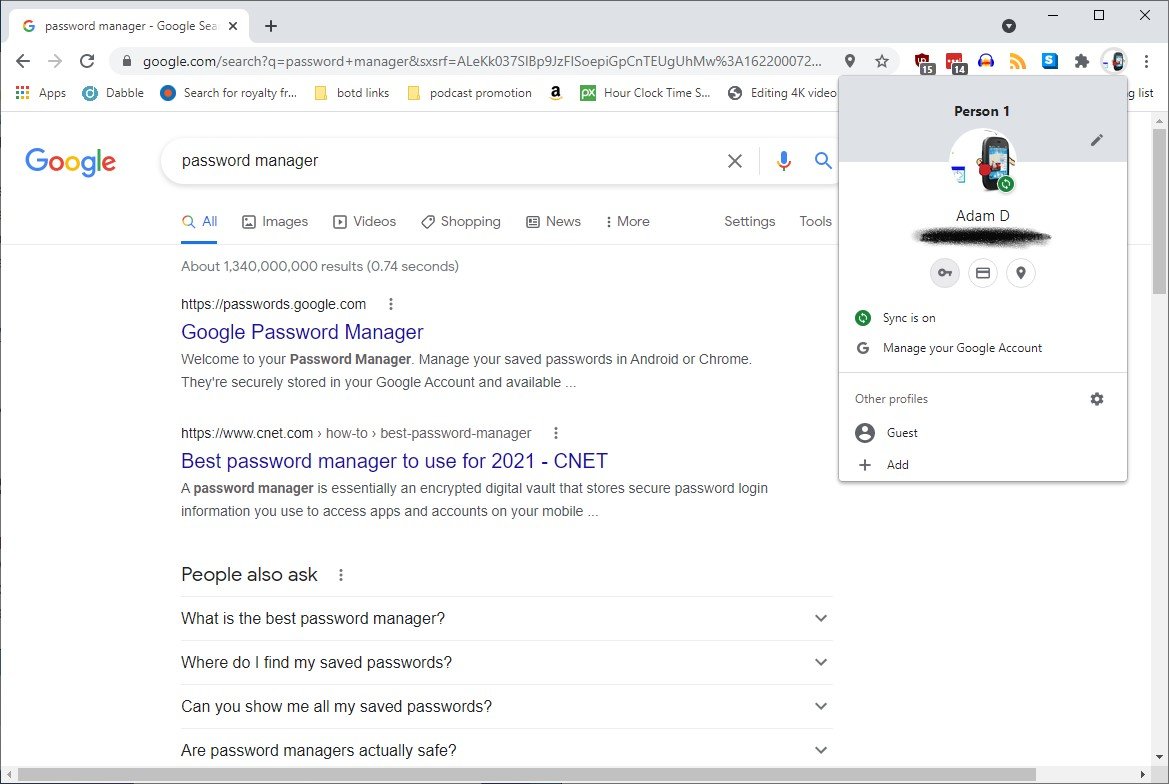
Tip 13: Google Password Manager
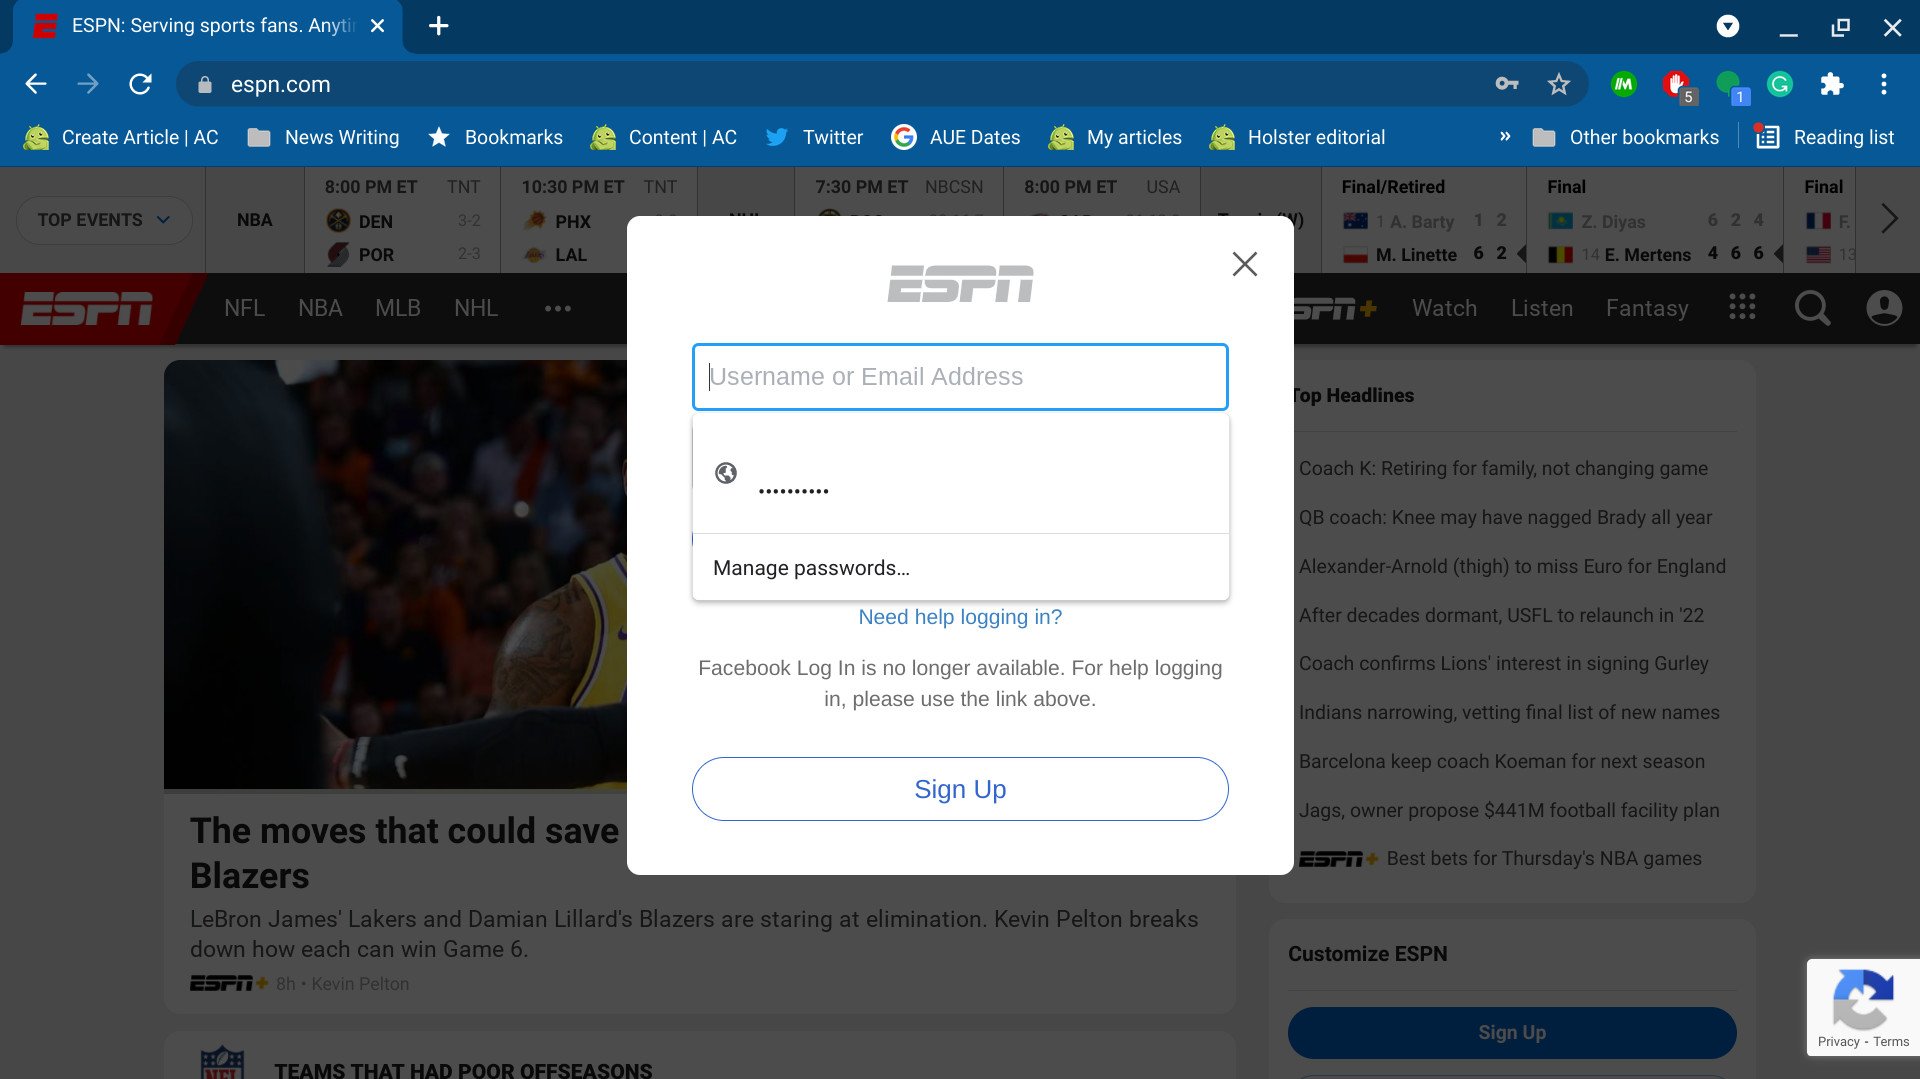
Instead of keying in your ID and password every time you log in somewhere, you can use the Google Password Manager. The Password Manager will do the work for you in a secure and effortless way. Before using it though, you need to save your password to the Manager. Here's how you can do that.
Start by opening up the website who's credentials you'd like to save. Open the login page and type out your username and password. Once you've typed out the details, click on the tiny key icon in the tab's address bar. Type in your username and click on Save.
After saving your username and password details to the Google Password Manager, you can go ahead and use it on the website. Next time you open the site, open the login page and click on the username field. A drop-down menu with your saved list of credentials will open up. Choose the right one for the website and click Log In.
Tip 14: Export your passwords
Migrating data over to a new device has become so much easier nowadays. For instance, you can use Google Chrome on desktop to export your saved passports in bulk. The passwords can be saved anywhere you in the form of a CSV file.
Launch Chrome on your PC and click on your profile picture in the top right corner. Spot the little key icon and click on it. A new tab with your password settings will open up. Click on the three dots situated on the far right side of the Saved Passwords heading.
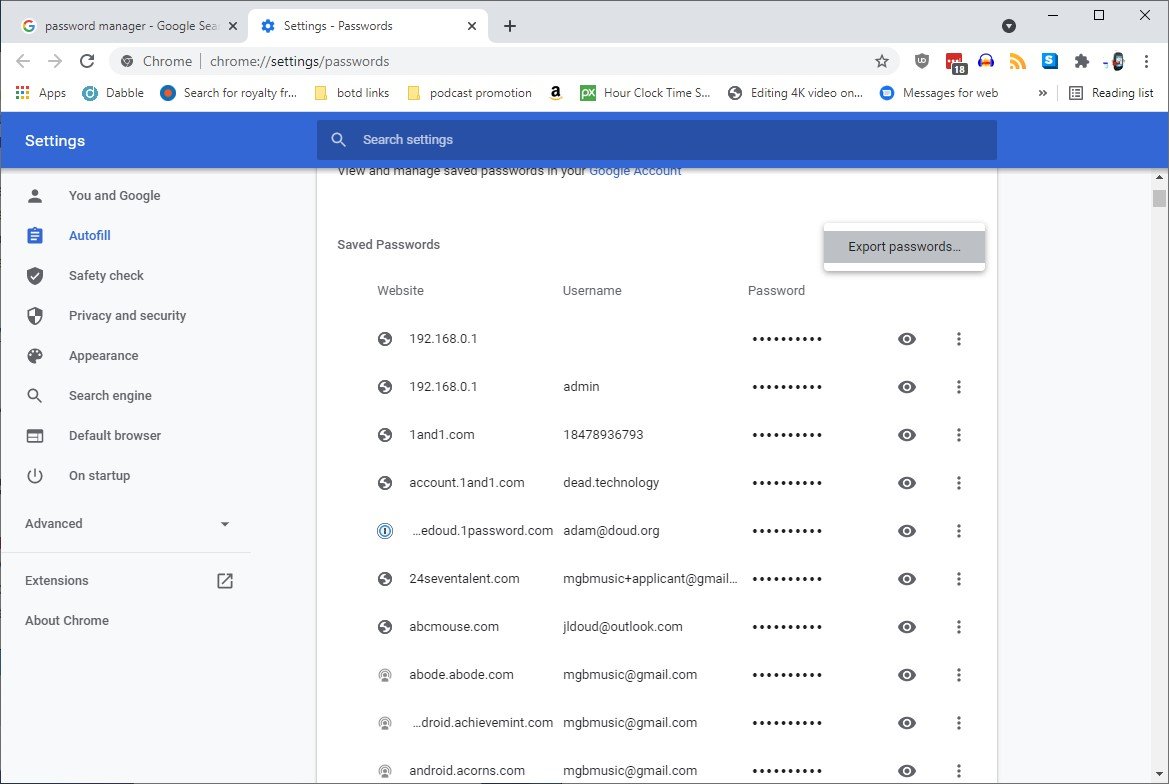
Finally, click Export passwords twice and then hit Save. The passwords will be saved in a cleartext CSV file that is perfect for transferring your information to another password manager.
Tip 15: Control website privacy permissions
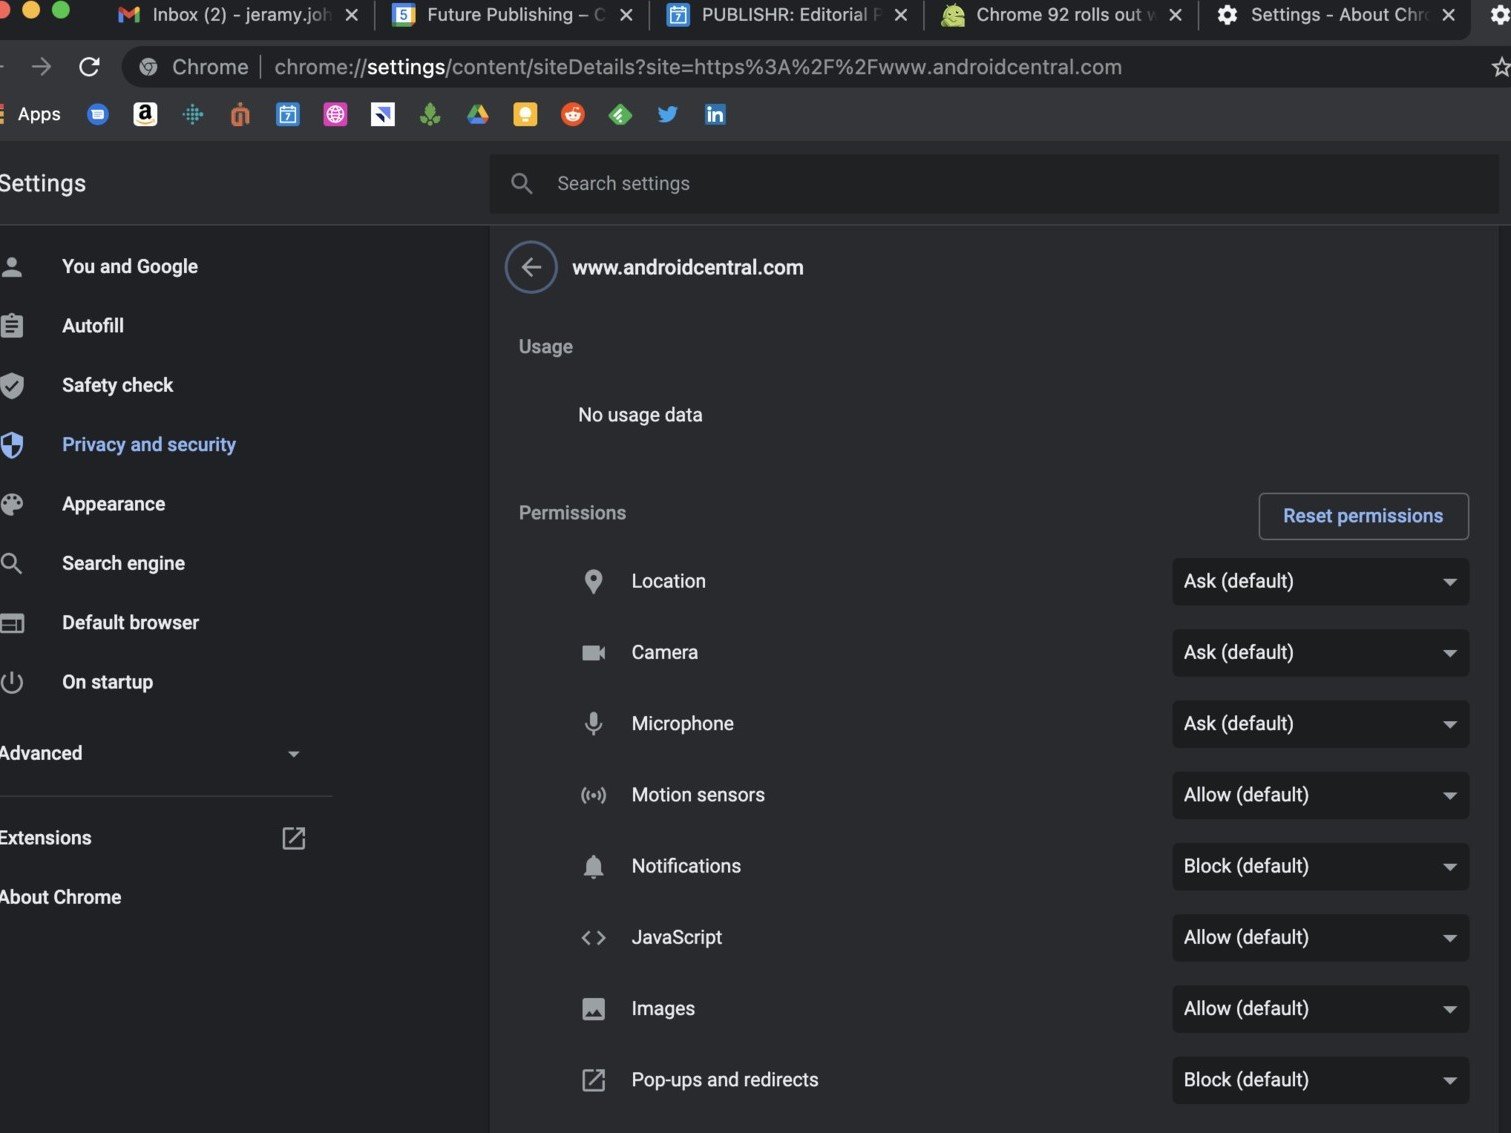
In Google Chrome, it is possible to configure the privacy permissions of every website individually. To do so, you need to click on the little lock icon on the left side of the address bar in your Chrome browser.
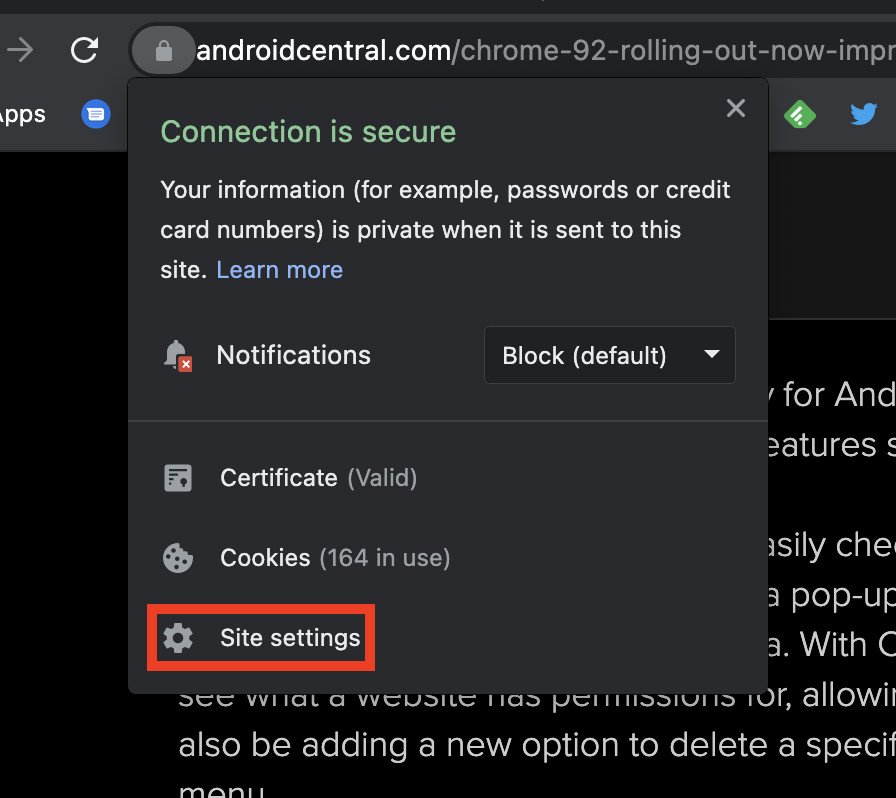

For the next step, click on Site settings to change privacy permissions of the website that is open. A new tab will crop up with all the permissions for the site. You can then choose which ones you want on or off.
Chrome-ify it all
This is a comprehensive list of the most useful tips and tricks in the book when it comes to the desktop version of Google Chrome. Can't get enough of the internet browser from Google? Take things further by experiencing Chrome OS on one of the best Chromebooks. There are plenty of hacks to be found on those as well so be sure to check out our roundup.
Source: androidcentral